Buttery, crispy, crumbly chocolate tart dough, plus a ton of tips to help you make it perfectly.
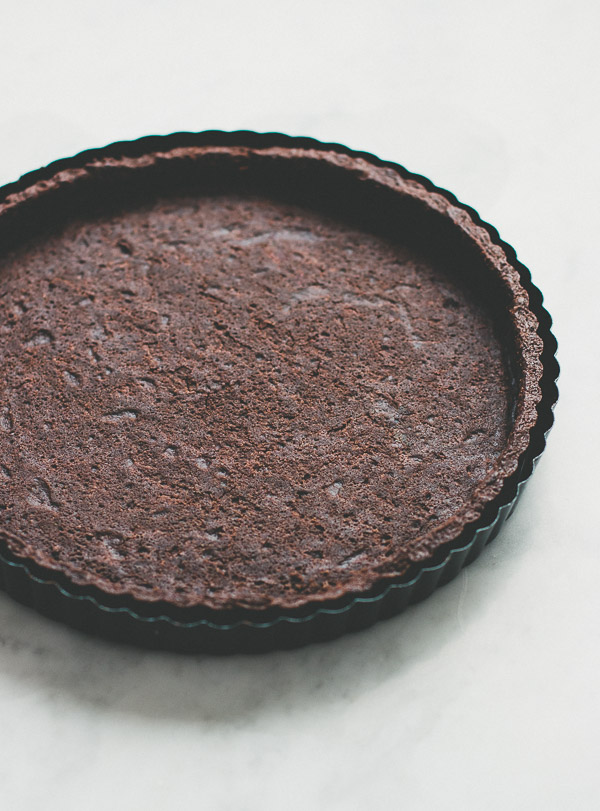
Chocolate dough is much less common than its more traditional sibling, but really the only difference between them is the addition of cocoa powder. I like using this whenever I’m working with chocolate-based fillings (although it goes well with so many others), and love its deep flavor and crumbly texture which reminds me of buttery sable cookies.
As with any pie or tart, the amount of work may look frustrating, but it will become simpler and quicker after a few tries. Besides, the results are well worth the preparation and practice.
We’ve already discussed all the following details in my other tart dough post, but let’s go over them again:
Granulated sugar vs powdered sugar
Powdered sugar is my preference since it yields a more tender crust with an unbeatable melt-in-your-mouth texture, while using granulated sugar makes it more crumbly. Different recipes use different amounts of sugar, but I find this one to be just perfect for a not-too-sweet crust with a sweet filling.
Eggs
Tart dough is usually enriched with eggs or egg yolks. In this recipe, I find that using 1 whole egg is pretty foolproof. If you like to experiment, try substituting the whole egg with 1 egg yolk plus 1-2 tablespoons heavy cream. The latter is actually my preferred version, but if you’re a beginner, stick to the whole egg.
If you don’t weigh your ingredients (and occasionally, even if you do), due to inaccuracy you might end up with a dough that’s a bit too dry or wet, but don’t worry. If it’s dry, add a bit of water, and if it’s wet, add a bit of flour. It will eventually come together.
What is blind baking?
Blind baking refers to baking the crust with aluminum foil and pie weights so that it won’t puff up and will bake beautifully. Once it’s no longer wet, we remove the weights and foil and continue baking for several minutes longer until set. Baking the crust first, without the filling, will prevent your crust from becoming soggy.
Would you like to save this recipe?
Partially baked crust vs fully baked crust
If your recipe calls for a filling that should be baked, you’ll need to partially bake the crust, add the filling, and then continue baking until the tart is done. If your filling doesn’t require baking (lemon curd or chocolate ganache, for example), you’ll need to fully bake the crust, let it cool, and only then add the filling.
While partially baked crust requires a shorter baking time than a fully baked crust, in both cases you’ll need to bake it with pie weights, then remove them and bake for a few minutes longer.
Here’s a good visual guide on how to use weights when baking a crust.
For step-by-step photos on how to make the crust, check out my pie dough recipe. Although the ingredients are different, the method is the same.

More delicious pie & tart dough recipes
Try my other trusted recipes, which I can assure you are just as delicious! You won’t need any other recipe ever again.
Delicious Tarts and Fillings
These are some of my favorite homemade tarts! It’s hard to choose just one!


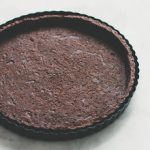
Chocolate Tart Dough
Ingredients
- 1 ⅓ cups (190 g/6.7 oz) all-purpose flour
- 3 tablespoons (20 g/0.7 oz) unsweetened cocoa powder
- ½ cup (55 g/2 oz) powdered sugar (or ¼ cup granulated sugar)
- Pinch of salt
- 1 ⅓ sticks (150 g/5.3 oz) cold unsalted butter, cut into small cubes
- 1 large egg
- ½ teaspoon pure vanilla extract , optional
Instructions
-
Process flour, cocoa powder, sugar, and salt in a food processor for a few seconds until combined. If you don’t have a food processor, you can do this by hand using a pastry cutter. Add butter and pulse until mixture becomes crumbly and resembles coarse meal, about 15 pulses. Add egg and vanilla extract, and keep pulsing until the dough is no longer dry and starts to clump together, about 10-15 seconds. Do not process to the point that a large ball of dough is formed; rather the dough should be quite crumbly with large clumps. Another way to check if it’s done is to take a piece of dough and press it between your fingers—the dough should stick without feeling dry or crumbly (some photos to make this clearer can be found here).
-
Turn dough to a lightly floured surface and form into a ball. It should come together quite easily without being too sticky. Flatten ball slightly with your hands to form a thick disc. Wrap with plastic wrap and refrigerate for at least 1 hour.
-
If you don’t want to use the dough right away, you can refrigerate it for up to 3 days, or freeze it for up to a month and then thaw overnight in the fridge.
-
To roll out the dough: Take dough out of the fridge and let it sit on the counter for a few minutes to soften slightly for easy rolling. On a lightly floured surface, roll the dough out into a 12-inch (30cm) circle, then place gently into a 9-inch or 10-inch tart pan (preferably with a removable bottom). You can do this by flouring a rolling pan and rolling the dough loosely around it, then unrolling it into the pan. Brush away any excess flour on the surface. With a sharp knife, trim the edges of the pastry to fit the tart pan. Cover pan with plastic wrap and place in the freezer until firm, about 30 minutes. Frozen dough is less prone to shrinking while baking.
-
To bake the crust: Preheat oven to 350F/180C and place rack in the center.
-
Press parchment paper or aluminum foil tightly against the crust, covering the edges to prevent burning. Fill with pie weights/dried beans/uncooked rice, making sure they’re fully distributed over the entire surface. Bake crust for 20 minutes, until foil no longer sticks to the dough. Transfer crust to a wire rack and remove weights and foil.
-
To partially bake the crust: Bake for 5 minutes longer. After that, it will be time to proceed with your tart recipe by adding the filling and finishing baking. According to your recipe, the crust should be used either while warm or after it’s been left to cool on a wire rack.
-
To fully bake the crust: Bake for about 10 minutes longer, until it appears dry. Transfer to a wire rack and let cool completely.
Recipe Notes
– If you prefer a sweeter dough, you can use more sugar. I suggest an additional 2-4 tablespoons.
– For a stronger chocolate flavor and deeper brown color, add an additional tablespoon of cocoa powder.
– Once you’ve perfected this recipe, try replacing the whole egg with 1 egg yolk plus ½ -2 tablespoons heavy cream to make it richer and even more delicious.


Marisse says
Can I replace the cocoa powder with a chocolate bar?
Shiran says
Unfortunately these two ingredients are not interchangeable.
Debbie says
Will this recipe work with a 10×4 rectangular tart pan?
Shiran says
Yes, you’ll probably have some extra dough 🙂
Katie Jones says
Would you change the baking time or temp if using mini tart pans?
Shiran says
Hi Katie. It’s the same temperature but you’ll need to bake them for less time.
Aditi Shringarpure says
how long does it take to cool before I add filling
Aura says
Wonderful!!!!
Melodie Reddy says
So simple but so good will never us any other recipe for a chocolate tart base, thank you
Stephanie @ Pretty.Simple.Sweet. says
Thank you, Melodie!
Jess says
I made this recipe for my Dubai chocolate pistachio pie. I blind baked it as instructed, and it turned out very crispy and flaky. It had a great crunch. It also was a very good thickness and formed well into my tart pan without splitting or cracking. Very pliable. Not too sweet. I have put this recipe into my permanent collection.
Thank you!
Jess
Stephanie @ Pretty.Simple.Sweet. says
Yum! Now I want the recipe for your Dubai Chocolate Pistachio Pie! That sounds incredible.