So you really want to start a food blog, but don’t where to start? I’ve been in your shoes, trust me, and I only wish that back then I knew how simple it was!
Stick with me for the next 15 minutes, and then start sharing your recipes to the world!
It only takes 4 simple steps to start a blog:
- Choose a name and make sure its domain is available (i.e. myfirstblog.com)
- Register your domain and sign up with a hosting service
- Install Wordpress (that thing that you write posts with)
- Add some final touches (make it pretty and usable)
Disclaimer: Some of the links used in this page are affiliate links and I will earn commission if you purchase through them. Rest assured that all recommendations and advice is based on my own positive experience with the services that I use and trust.

Now, let’s dive into some details:
1. Choose a name and make sure the domain name is available
That’s the exciting part! You are about to choose a name that will market your blog for years to come.
My domain is prettysimplesweet.com. When I got started, I cleared some time to brainstorm and picked names that I loved and thought people could easily connect to.
After you come up with a list of your favourite names, you need to make sure the domain name is available. You can use the following tool for that (make sure you don’t purchase the domain at this stage – you can get it for free with the hosting service)
If you find this process frustrating, you can get help with finding a cool (and available) name for your blog using ChatGPT or another similar AI brainstorming tool.
2. Register your domain and sign up with a hosting service
So, you’ve found the perfect name – that’s awesome! Now all you need to do is to register it and sign up with a hosting service.
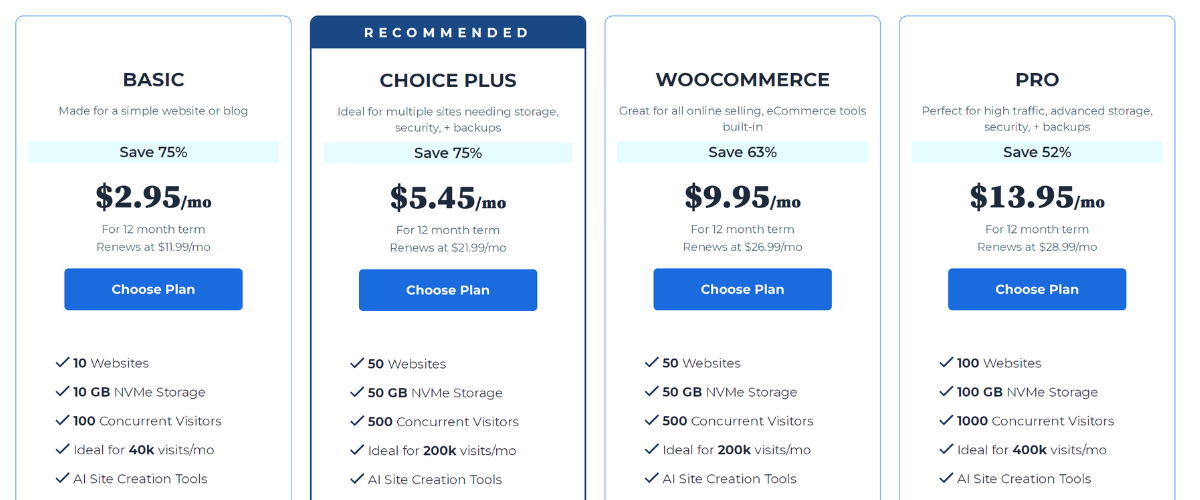
A hosting service is what runs your blog and takes care of all the technical aspects of making sure your blog is up and running and serves everyone who wants to access your content. I recommend signing up with a hosting service that specializes in managing Wordpress installations. The leader in beginner Wordpress hosting is Bluehost. Bluehost is a good and safe bet for a hosting service to get you started quickly and safely.
First, go to the Bluehost signup page here, you’ll see the different plans. I suggest that you start with the cheapest starter plan ($2.95/mo) even though they recommend the $5.45/mo plan. Note that Bluehost charges for a discounted yearly fee rather than a costly monthly plan.
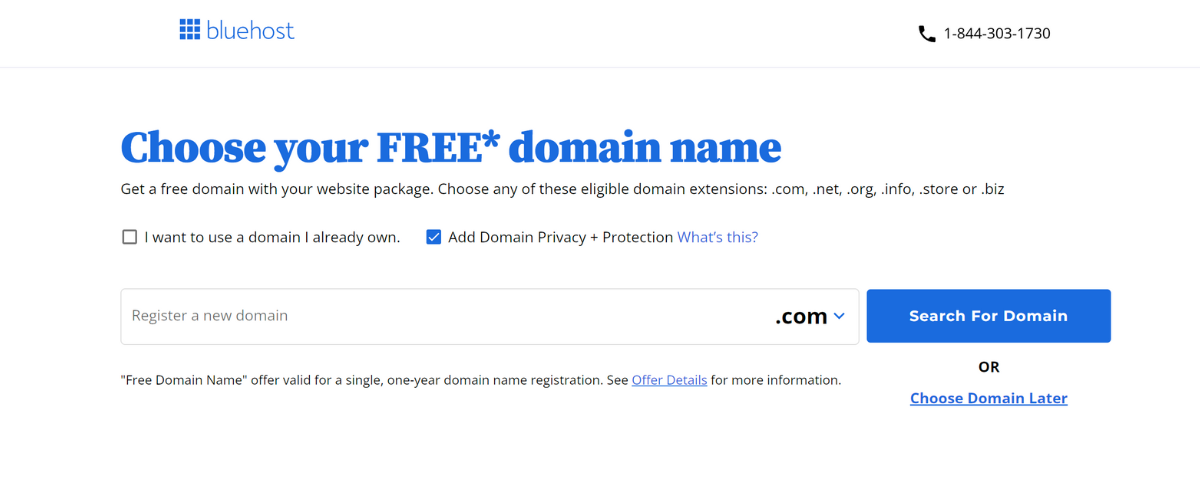
Bluehost provides a free web domain registration that’s bundled with the service (otherwise, it usually costs extra). Just enter your domain name in the following page, and they’ll register it for you:
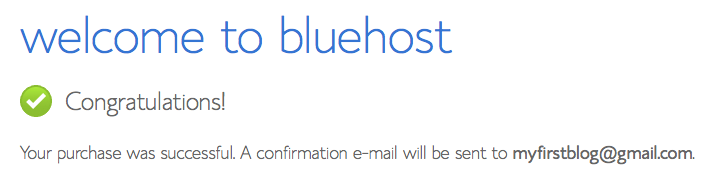
Next, choose your account plan details upon checkout. There are also a few add-ons available for purchase. Note, that you’ll be able to add those later so no need to commit at this stage.
That’s it!
A note about hosting services:
There are many good options out there. I’d recommend switching to another host once your blog has gained significant traction. This recommendation is only for your first year of starting out.
I currently use BigScoots as my host and pay about $1300/yr. They have become the gold standard for food bloggers, but it’s more expensive. They are my recommendation for anyone with a monetized blog.
3. Install Wordpress
So, you registered your domain and signed up with a hosting service – you’re almost done!
Wordpress is the leading content management software, trusted and used by hundred of thousands bloggers around the world.
It was really easy to setup Wordpress on Bluehost when I used them. The screenshots from below are from several years ago so they may look a little different now, but the utility is the same.
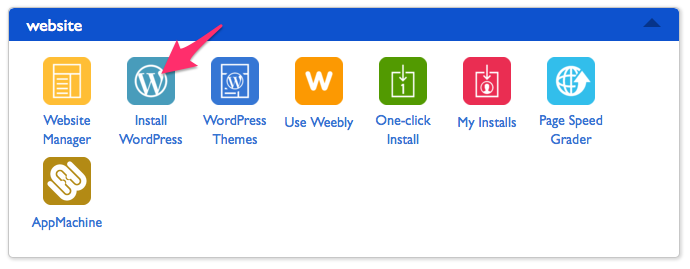
After logging in to Bluehost, I clicked on Wordpress on the Website Builders section:
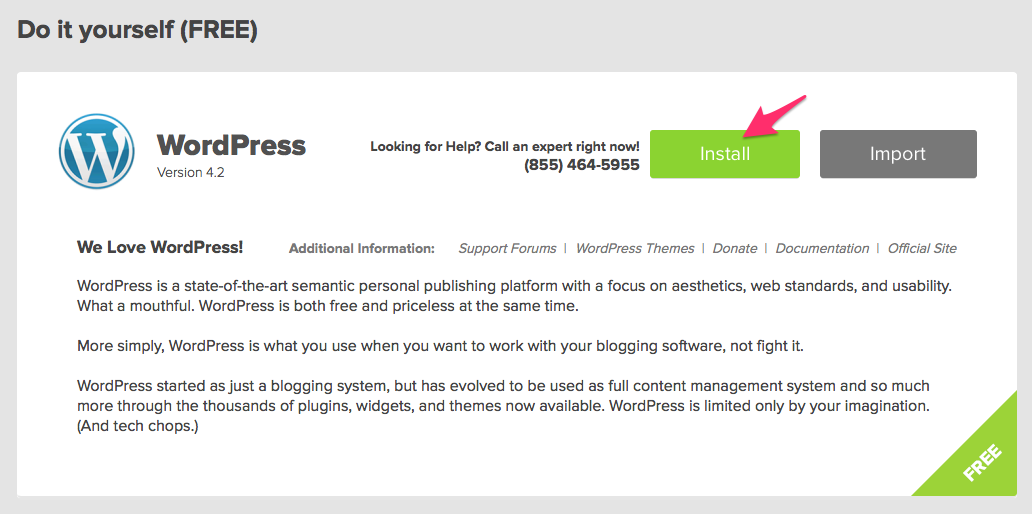
Next, I clicked the install button:
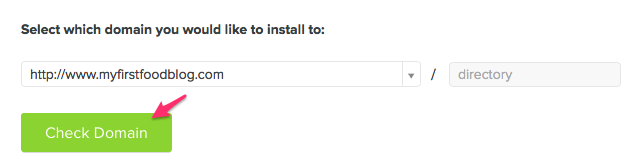
Then, I clicked “Check Domain”:
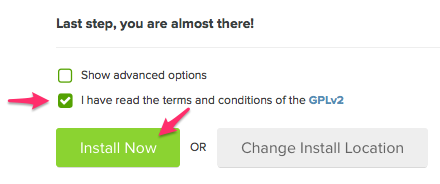
Check the terms and condition box, to acknowledge that you’ve read and approved:
After the installation is complete, click “View Credentials” to get information how to access and manage your blog:

Then click on “View”, to display your login information:

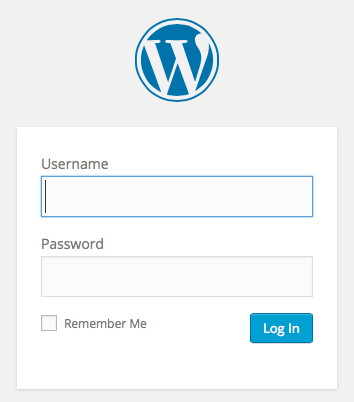
Then, you’ll see the temporary Username and Password for your blog. Note that you can easily change this later, but for now go and manage your blog by clicking the Admin URL link:

You will see the Wordpress login screen. Enter the username and password that were displayed in the previous page.
You are now logged in to your blog management page – woohoo! You are just one step away from launching your blog. Just click on the “click here” link to publish it:

4. Add some final touches
If you got here, this means you have a blog up and running and available for everyone to see! Mazal tov, that’s brilliant!
Now, last (but not least), let’s add some final touches to make your blog appear professional to match the great content that you’re about to write.
The first, and most important step is to install a beautiful theme. While there are some nice and free options here, I suggest going for a premium theme. I use Feast Genesis, Seasoned Pro – used by many popular blogs. It’s important to have a theme that is continuously updating with WP and Feast does a fantastic job at this.
And voila, you’re done!
Now that you have this awesome new blog, here are some cameras and lenses I recommend for food phototgraphy. Once you have the proper equipment, creating content will start to become second nature to you!
Still on the fence? Here are 10 reasons to start a food blog in 2025.