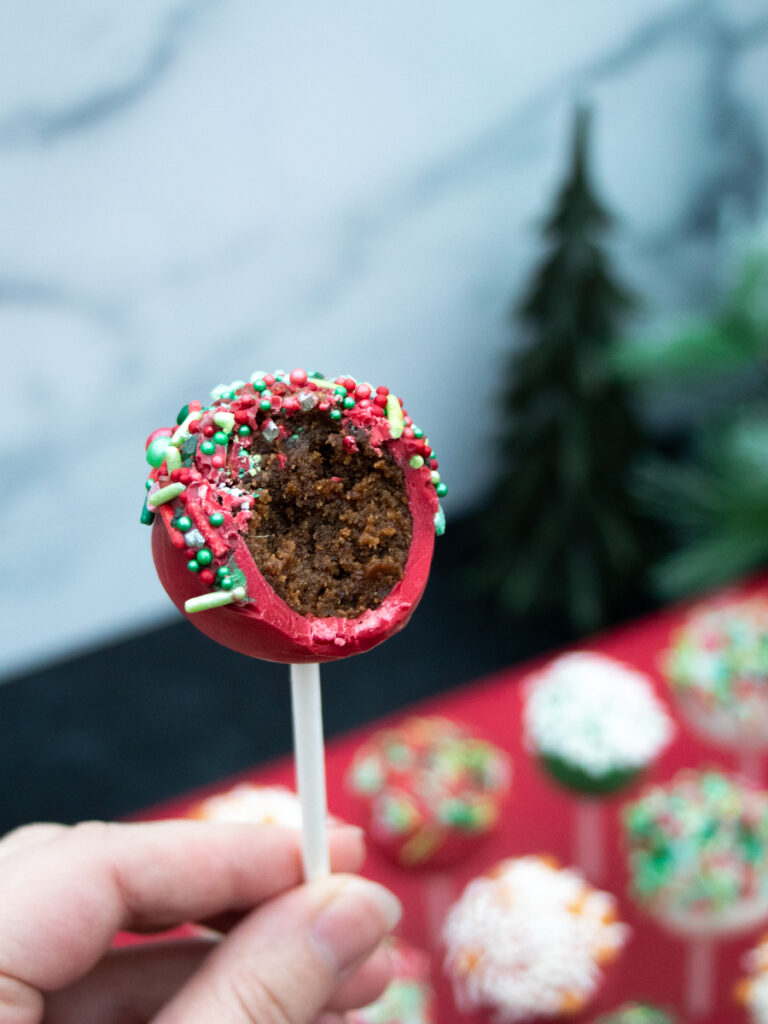
Fa-la-la-la-la! Tis the season to deck your treats with loads of sprinkles! These festive delicious gingerbread cake pops have the most amazing ginger flavor from my stout gingerbread cake recipe, embodying all the flavors of the season. They are easy to serve at parties or keep on hand in the freezer for whenever you need a cake fix (daily, if you’re like me)!
As an Amazon Associate, I earn from qualifying purchases.
I wish I could tell you that I’m perfect and never make mistakes, but that would be a total lie. Originally, I set out to make a gingerbread cake using a very cool gingerbread house-shaped pan I purchased from NordicWare (linked so you can see how cute it is!). Usually I can use their pans without fail. This pan, however, was a nightmare for me with traditional gingerbread cake. The cake stuck to every nook and cranny in the pan and wouldn’t come out whole in one piece. Perhaps the cake was too heavy and sticky due to molasses… I will try again using a different recipe before I write off the entire project. While I didn’t originally plan on making cake pops, they are my FAVORITE way to save a delicious cake that sticks to the inside of the pan.
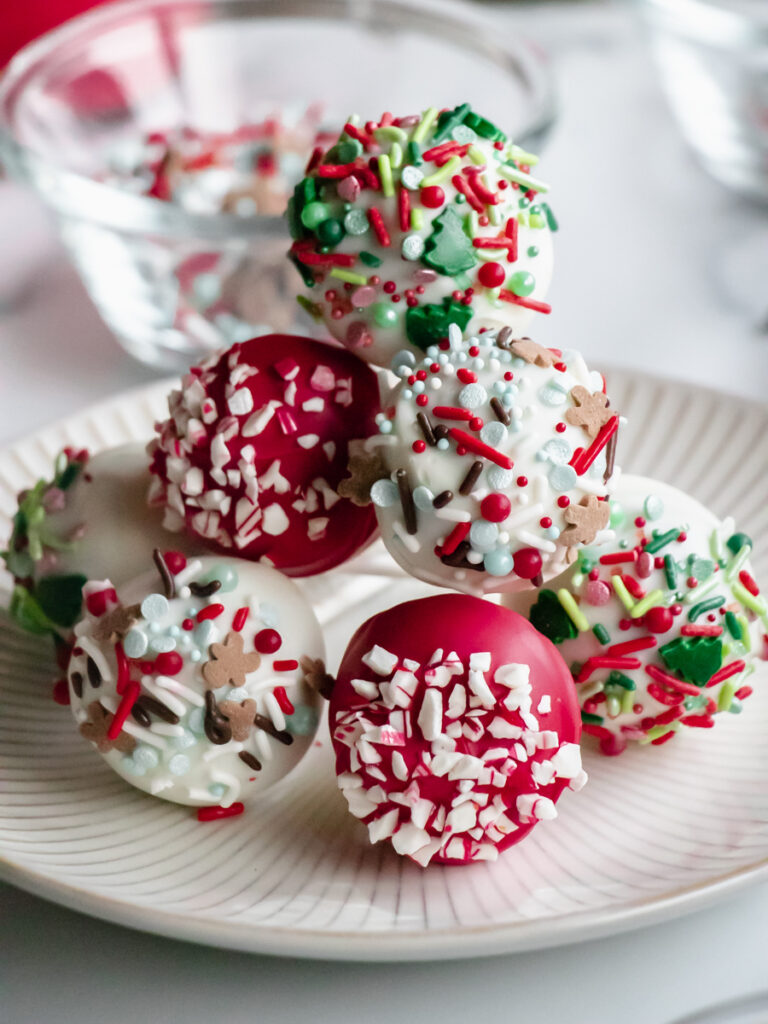
Supplies needed for cake pops
- Mixer, hand-held or stand fitted with a paddle attachment.
- Sheet pan lined with parchment paper.
- Glass measuring cup or tall glass for melting chocolate.
- Melting chocolate or Meltables
- Lollipop Sticks
- Sprinkles or crushed peppermint
(links to sprinkles shown: gold/white, gingerbread blue/white/red, christmas trees mix) - Floral foam (not styrofoam) wrapped in thin layer of tissue paper or cardboard box with pre-poked holes.


How to make cake pops
Making cake pops requires 3 steps. The first step is to make the cake! In this case, I chose to make my delicious Stout Gingerbread Cake. If you click that link, it will take you directly to the recipe for further cake instructions.
Step 2: Make the frosting & form the cake balls
- You’ll mix together a basic, light and fluffy American buttercream frosting.
- Remove the gingerbread cake from the pan and crumble the cake right into the frosting mixture. Mix together the cake crumbles right into the frosting until combined. A large dough ball will form.
- Scoop out the cake and form into 1 Tablespoon-sized round balls. Place them on a parchment lined sheet pan and refrigerate for 2 hours or 1 hour in the freezer. It is important that the cake pops are nice and cold for dipping in melted chocolate.
Step 3: Dip the cake balls
- Prepare your cooling station for the cake pops. I’ve used an amazon box with little holes pokes in the top about 2″ apart or floral foam. The floral foam is my preferred method. I typically wrap floral foam in a thin layer of tissue paper for displaying the cake pops while serving.
- Transfer tray of cake balls to the fridge if you chose the 1 hour freezer method. Cake balls should be dipped in chocolate within 24 hours for best results or they will dry out in the refrigerator.
- Melt your melting chocolate in a tall glass or glass measuring cup. Microwave in 30-second increments, stirring thoroughly in between, until your chocolate is melted and smooth. Chocolate can be melted over a double boiler as well and keeps the chocolate melted and warm for a faster coating process.
- Remove 1-2 cake balls at a time from the refrigerator so they are nice and cold. Dip the tip of the lollipop stick into your melting chocolate so it somewhat resembles a Q-tip end. Place that end halfway into the cake ball and then dip the ball in melted chocolate. Coat the entire ball so that the ball is entirely covered in chocolate, especially where the base meets the stick. Tap any excess chocolate off by tapping the stick against the glass cup. Dip cake pop into sprinkles immediately. Repeat with all remaining cake balls. Continuously keep reheating your melted chocolate when it gets harder to use.
- Let the cake pops dry for at least 30 minutes before serving, packaging, or freezing. Refrigerate cake pops for up to a week in an airtight container, but note that they can form condensation from being in the fridge. They can also sit out at room temperature in an airtight container in a cool, dry place for up to 2 days without issues. Freeze cake pops in an airtight container for up to a month and thaw overnight in the fridge.
Why should I make cake pops
Typically, these are best made for parties where handing out individual desserts is ideal. Cake pops are also amazing because they are so easy to transport. These desserts can be made in advance so they are hassle-free the day of your party. I like to wrap mine as amazing party favor treats to hand to guests as they leave.


More delicious holiday baking recipes you’ll love
- Soft and Chewy Molasses Cookies: These have the perfect gooey texture, are lightly spiced, and make a delicious snack especially during the holidays!
- Gingerbread Bars: Wonderfully-spiced gingerbread cookie bars topped with simple glaze are perfectly moist, and have an irresistable fudgy texture.
- Gingerbread Man Cookies: Crunchy on the outside and soft on the inside, they’re an amazingly fun and festive way to celebrate the holidays!
- Chewy Chocolate Ginger Cookies: These eggless double chocolate cookies are chewy, gooey, and spiced with fresh ginger for an absolutely amazing flavor.
Gingerbread Cake Pops
With so many flavorful ingredients, this dark, bold, and intensely spiced gingerbread cake turns into fantastic cake pops with the addition of an American buttercream frosting, white chocolate coating, and of course, sprinkles.
Ingredients
- 1 Stout Gingerbread Cake *recipe link below
Buttercream Frosting
- 5 Tablespoon butter, unsalted, softened to room temperature
- 1 ⅓ cup powdered sugar
- 2 teaspoons heavy cream or milk
- ½ teaspoon vanilla extract
Cake Pop Supplies
- 30 lollipop sticks
- 36 oz melting chocolate
- floral foam or cardboard box for drying & displaying
- 3-4 oz sprinkles
Instructions
Make the frosting
-
Using a stand mixer with paddle attachment or handheld mixer, beat the butter on medium speed for 3-4 minutes until light and creamy. On low speed, slowly add in powdered sugar, cream or milk, and vanilla until well combined. Mix on medium-high speed for 2 minutes until light and fluffy.
-
Remove the gingerbread cake from the pan and crumble the cake right into the frosting mixture. Make sure you don't add any hard lumps of cake. On low, stir together the cake crumbles right into the frosting until combined. A large dough ball will form.
-
Scoop out the cake balls into 1 Tablespoon sized round balls. Place them on a parchment lined sheet pan and refrigerate for 2 hours or 1 hour in the freezer. It is important that the cake pops are nice and cold for dipping in melted chocolate.
Dip the cake balls
-
Prepare your cooling station for the cake pops. I've used an amazon box with little holes pokes in the top about 2" apart or floral foam. The floral foam is my preferred method. I typically wrap floral foam in a layer of tissue paper for displaying the cake pops while serving.
-
Transfer tray of cake balls to the fridge if you chose the 1 hour freezer method. Cake balls should be dipped in chocolate within 24 hours for best results or they will dry out in the refrigerator.
-
Melt your melting chocolate in a tall glass or glass measuring cup. Microwave in 30-second increments, stirring thoroughly in between, until your chocolate is melted and smooth. Chocolate can be melted over a double boiler as well and keeps the chocolate melted and warm for a faster coating process.
-
Remove 1-2 cake balls at a time from the refrigerator so they are nice and cold. Dip the tip of the lollipop stick into your melting chocolate so it somewhat resembles a Q-tip end. Place that end halfway into the cake ball and then dip the ball in melted chocolate. Coat the entire ball so that the ball is entirely covered in chocolate, especially where the base meets the stick. Tap any excess chocolate off by tapping the stick against the glass cup. Dip cake pop into sprinkles immediately. Repeat with all remaining cake balls. Continuously keep reheating your melted chocolate when it gets harder to use.
-
Let the cake pops dry for at least 30 minutes before serving, packaging, or freezing. Refrigerate cake pops for up to a week in an airtight container, but note that they can form condensation from being in the fridge. They can also sit out at room temperature in an airtight container in a cool, dry place for up to 2 days without issues. Freeze cake pops in an airtight container for up to a month and thaw overnight in the fridge.
Recipe Notes
Note: I make the cake the day before so that assembly is easy. Cover it and keep it at room temperature.


Leave a Reply