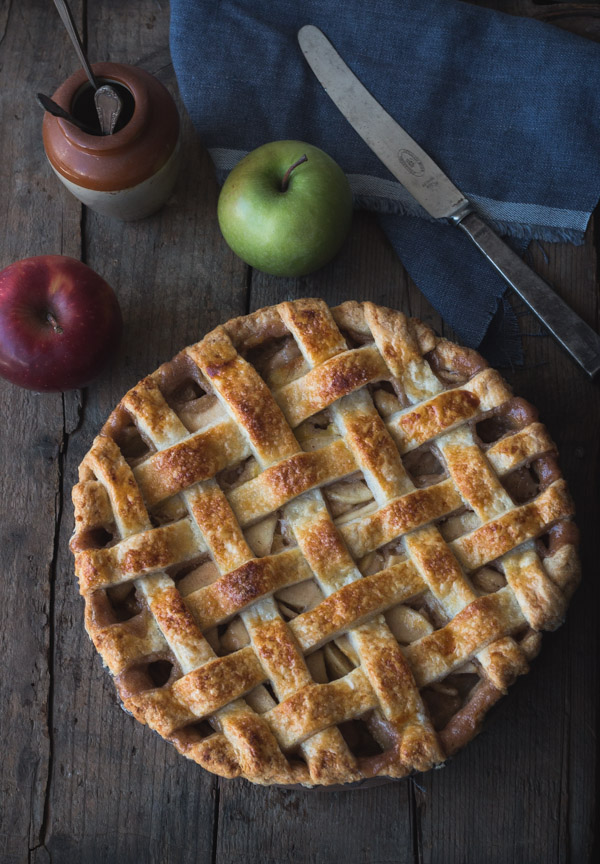
With a buttery, flaky crust and rich caramel apple filling, this is a perfect apple pie that’s sure to please year after year. It’s simple to make and perfect for fall – and a guaranteed crowd pleaser!
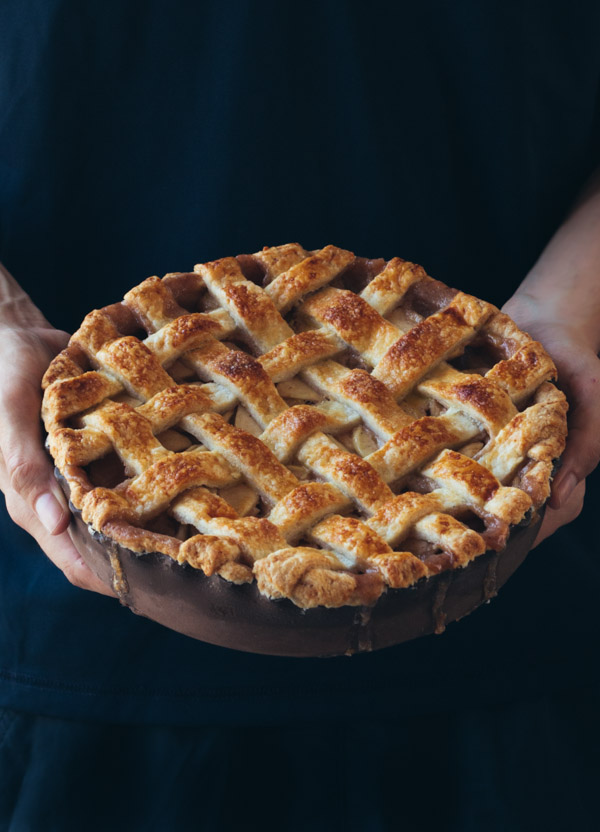
There’s something magical about apple pies. They provide an inherently cozy, homey, relaxing feeling which is why it’s one of my favorite apple dessert recipes. It’s like I can take a bite and instantly forget about all my problems – which is exactly what I’m doing right now, by the way.
I didn’t like apple pie in my childhood. In fact, I didn’t really like any fruit-based desserts. Instead, I was (and always will be) a chocolate-loving girl. Still, my mom never gave up and kept letting us try her caramel apple pies while the younger, more stubborn version of me kept telling her that apple pie was simply for old people. I guess that I was right on some level, because now that I’m older (older, not old – but depends who you ask), I love apple pie.
The day I really fell in love with apple pie was when I was on a tour to the Amish country with my family. My mom ordered one, and when she took a bite, her eyes were filled with such joy that it made me curious. So curious, in fact, that I had to try it myself. And I mean…it was unbelievable!
Making an apple pie requires a few steps, so make sure to read the recipe and the entire post before you start in order to keep yourself organized. And don’t forget to serve it with a scoop of creamy no-churn vanilla ice cream! This pie is also the perfect Thanksgiving dessert idea.
Would you like to save this recipe?
This recipe has two main components:
- Pie crust
- Apple filling
How to make caramel apple pie
- First, make my perfect pie crust. This recipe makes two discs of dough. Allow both to chill for about an hour, as directed in the recipe.
- Roll out both crusts into circles. They should be about ¼-in thick. Place one in a pie pan, and the other on a baking sheet lined with parchment paper. Cover with plastic wrap or aluminum foil and place in the fridge. This step can also be done after you make the apple filling.
- Slice the apples. Slice the apples into about ⅛-in thick slices, but don’t worry if it’s not exact. For a complete guide, check out my article on how to cut apples for apple pie (see? I’ve got you fully covered:).
- Make the filling. This is done on the stovetop to create a gooey caramel sauce that bakes with the apples. Let it cool to room temperature for about 30 minutes.
- Fill your pie. Spread the apple filling on top of the crust layer in your pie pan. Then, place and arrange the other crust on top of the filling. Cut 2-3 slits in the top layer of dough with a pairing knife, about and inch and a half long. This allows the steam from the filling to escape to your crust will be crispy. You can also make a lattice crust if you prefer (I’ve got a post for that one, too).
- Bake the pie. To get a good browning, brush the top with egg. Then bake the pie in the lower third of the oven, placing the pan on a baking sheet layered with parchment paper to catch any liquid that may leak from the filling. Starting at a high temperature also helps the pie to achieve a perfectly browned crust. After a while, the temperature should be reduced to let the apples cook thoroughly without risking burning the crust. If you find that the top crust is browning too much while baking, cover it loosely with aluminum foil.Let the pie sit for at least four hours to let the filling thicken. Honestly, the waiting time was the hardest part of the recipe for me!
Commonly asked questions
What kind of apples should I use for apple pie?
You can use either sweet or tart apples for the filling, or a combination of both. I like to use Granny Smith, but I sometimes combine them with another sweet red kind such as Pink Lady for more dimension and flavor.
Why pre-bake the apples?
This will help them release their juices now rather than while baking, which will result in a firmer, less soggy crust. The cooking will also create a thick caramel sauce that coats the apples (and makes the pie irresistible!). Need one more reason? Apples shrink when cooked, so without precooking, there will be a large gap between the filling and the top crust. It only takes a few minutes and, as you can see, the rewards are tremendous.
Can I make my crust ahead of time?
Yes. Pie crust dough can be kept in the refrigerator for up to 3 days, or even the freezer for up to a month.
How do you know when the pie is done baking?
The top crust will appear golden brown and you’ll be able to see apple filling bubbling around the edges and through the slits on the top. Once you see the filling bubble for about 5 minutes in the oven, remove the pie and let cool.
What temperature do you bake apple pie at?
This recipe calls for baking the pie in a 425F for 15 minutes. Then, reduce the oven to 375F until the crust is golden brown (about 40 minutes longer).
Now, I’ll stop talking so you can make some delicious pie, okay?
Before you start, make sure to check out my step-by-step photo tutorials to make perfect caramel apple pie:
More of my favorite apple recipes:
- Baked Apple Cider Donuts: These show stopping donuts are soft and tender and coated in a delicious cinnamon-spice mix.
- Salted Caramel Apple Scones: Apples and caramel sauce shine in these scrumptious, butter scones.
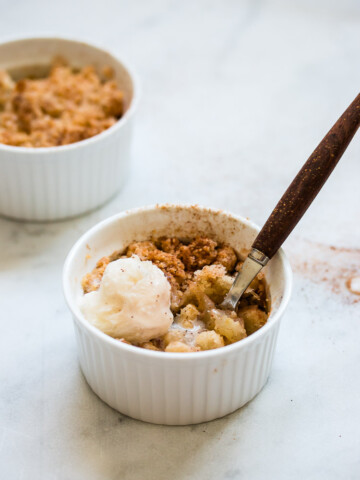
- 5-Ingredient Individual Apple Crumble: The perfect addition to any fall meal, these warm and comforting apple crumbles are so simple to make.
- Easy Puff Pastry Apple Tart: One of my go-to recipes, crispy puff pastry is baked with apples, sugar, and fall spices for a yummy treat. Best served with vanilla ice cream!

Perfect Caramel Apple Pie
Ingredients
- double-crust pie dough
- 6 large apples (about 2.5 pounds/1.1 kg), peeled, cored, and sliced into ¼-inch thick slices
- 1 tablespoon freshly squeezed lemon juice
- ½ cup (100g/3.5oz) granulated sugar
- ½ cup (100g/3.5oz) light brown sugar
- ¼ cup all-purpose flour
- ¼ teaspoon salt
- 1 teaspoon ground cinnamon
- ¼ teaspoon ground nutmeg (optional)
- ¼ cup (½ stick or 56g) butter
- ¼ cup heavy cream
- 1 teaspoon vanilla extract
- 1 egg or egg white , beaten, for brushing the top crust
- Coarse or granulated sugar , for sprinkling (optional)
Instructions
-
Roll out the dough: Take one disc of dough out of the fridge and let it sit on the counter for a few minutes to soften slightly for easy rolling. On a floured surface, roll the dough out into a 12-inch circle. Place the dough gently into a 9x2-inch pie pan; you can do this by flouring a rolling pan and rolling the dough loosely around it, then unrolling it into the pan. Brush away any excess flour on the surface. With a sharp knife, trim the edges of the pastry to fit the pie pan. Cover pan with plastic wrap and place in the fridge. Roll out the other disc in the same fashion, then transfer to a baking sheet lined with parchment paper. Cover with plastic wrap and place in fridge.
-
Make the apple filling: In a large bowl, toss together apples and lemon juice. In a small bowl, mix together sugars, flour, salt, cinnamon, and nutmeg, then add to the apples and toss to combine. Add heavy cream and vanilla, and mix again.
-
In a large heavy skillet over medium-low heat, melt butter. Add apple mixture and cook, stirring occasionally, until the apples are just slightly tender and coated with a caramel-like sauce, about 8-10 minutes. Remove from heat, transfer to a large bowl, and let cool to room temperature for about 30 minutes.
-
Preheat oven to 425F/220C. Line a baking sheet with parchment paper and place in the lower third of the oven.
-
Spread apples and sauce in an even layer onto pie crust. If you choose to make a lattice pie, this is how you do it. Otherwise, place the other crust (the one you put on the baking sheet) over the apples. Tuck any excess overhang pastry under the bottom crust, then crimp the edges using your fingers or a fork. Make 4 slits in the center to let steam escape while baking. Brush the crust with egg (a very thin coating), then sprinkle with sugar if you like.
-
Bake for 15 minutes, then reduce heat to 375F/190C and continue baking until the crust is golden brown, the apples are tender (not mushy) when you insert a knife, and juices are bubbling through the slits – about 40-50 minutes longer. If the top is browning too much while baking, cover loosely with aluminum foil.
-
Allow pie to cool for at least 4 hours before serving so that the filling can set. Store pie in the fridge for up to 3 days.
-
Serve warm or at room temperature.


Rayna Ramirez says
would it be possible to make mini heart shaped pies with this recipe ?
Shiran says
Hi Rayna! Yes, it’s definitely possible. I used this recipe many times to make mini pies and they turned out perfect. The only thing is that the quantities (dough to filling ratio) and baking time are gonna be different, but if you’re used to making pies I’m sure you’d be able to figure those out.
Rayna Ramirez says
Thank You !
Loethlin says
The filling is great. My dad, the neophobe, loved it. And usually, he only accepts Apple Pie The Way My Mum Used To Make. So thanks!
Shiran says
Thank you so much, Loethlin! 🙂
Natalie says
Your blog is such an awesome resource! I’ve been looking for apple pie recipes all week and had 4 or 5 different websites bookmarked on my phone for the various tutorials I need. I found your site this morning and will be using it instead 🙂 Can’t wait to make this!
Shiran says
Thank you so much Natalie! I hope you like it! It’s a favorite in our family 🙂
Shirley says
I am excited to make this pie! Thanks for sharing
Patricia says
I was looking for an apple pie recipe and found your site. I am so glad that I did! Made the apple pie this weekend and my husband loved it. This recipe is definitely a keeper! Thanks for sharing this fabulous recipe.
Shiran says
Thank you Patricia! I’m glad you like it!!
Ishita says
Hello! Absolutely love the pie!
Just one question though, how do you reheat it before serving so that the crust doesn’t become soggy? Please let me know ASAP.
Shiran says
Preheat the pie just until it’s warm, not hot, and it won’t become soggy. The best option is to use a toaster oven, if you have one, or the oven. Preheat it to 350F or lower, and heat for several minutes until warm. If it’s just a piece of leftover pie, then I’m usually lazy and heat it in the microwave for several seconds.
Ishita says
Thank you! That really helps =)
Kaitlyn Boese says
Thank you for this amazing recipe. It was delicious! I’m looking forward to making your cherry pie recipe next ^_^
camille says
Hi Shiran,
I tried this recipe for our Thanksgiving dinner last sunday.
Instead of pie dough on top, I used your crumble recipe (from your apple crumble recipe ) ? and they loved it! just right amount of sweetness. And today (as of this moment) I’m baking it again just waiting for the apple filling to cool down.
thanks for sharing your recipe! looking forward for more! ?
Hope Davis says
Can I leave the pie to cool overnight? Do I need to refrigerate it or can I serve it in the evening for our thanksgiving dinner without refrigeration. I prefer room temp pie.
Shiran says
If you make it at the same day, you can leave it at room temperature, but if you want to make it the day before, keep it in the fridge. Take it out of the fridge 2-3 hours before serving.
laurence allard says
I was wondering, can this pie be frozen?
Shiran says
For the best flavor I recommend using it fresh, but you can freeze it, then thaw overnight in the refrigerator and allow to come to room temperature before serving.
Erica says
Found your Apple Pie recipe sounded wonderful. Made it al most immediately. The aroma floating through the house Is awesome. Cannot wait to try it. Will definitely be making this again. By the way ai also made Your Cherry Pie and I was blown away. Thank you Your recipes are easy to follow and taste beautiful
Rebecca says
I am a little confused with directions for step 4. and 5. It says line the sheet and then later it says place the pie crust that you put on the lined sheet on top-that is what I’m confused about because we’re not just putting the top crust in the oven alone, right?
“(the one you put on the baking sheet)”
Thank you for this recipe!
Shiran says
Hi Rebecca, at step 4 you only line a baking sheet with parchment paper and place it in the oven. When you later place the pie in the oven you put it on that baking sheet and bake. At step 5 you fill the pie crust with the apple filling, and then arrange the other crust on top of the apples, then bake the pie.
Marcia says
This recipe sounds delicious and I can’t wait to try it. I usually use a crumb topping (aka Dutch apple pie) instead of a top crust. Do you think a crumb topping would be too sweet since the apples are caramelized?
Shiran says
Crumb topping will be delicious. If you don’t want it to be very sweet, you can use a bit less sugar in the crumb recipe.
Jean says
Thank you for your wonderful recipe! I’m making it a second time. I’ve noticed that for some reason, my pie dough seems insufficient? I try to roll them out to a 12-inch circle but in order to do that, the pie dough becomes too thin and fragile. Am I doing something wrong?
Zahra shahidi says
Mine on first attempt turned out great, thank you
Annie says
Great recipe, thank you.
I do have a question and that is how do I get my pastry to roll out nicely without splitting? Every time I make pastry take it out the fridge let it warm up for a couple of minutes then on a floured work surface start rolling, the dough always splits from the out edges. Should I be alllowing it to warm up a bit more or ??
Thank you so much I do treasure your recipes
Talia @ Pretty. Simple. Sweet. says
Hi Annie, it can be very frustrating when your dough just won’t cooperate! You want to work with the dough when it’s cold, so I wouldn’t let it sit out too much longer than you already are. A little trick I like to use it keeping a bowl of ice water next to me while working and it allows me to patch up any cracks that might occur as I go. Just take a bit with your finger and use it to pinch the dough over any cracks. Also, be sure to apply even pressure to all parts of the dough as you roll it out and keep spare flour nearby to add a bit when you feel the dough getting sticky. This will help the rolling pin move smoothly and make it less likely for the dough to tear. Hope this helps! Good luck!