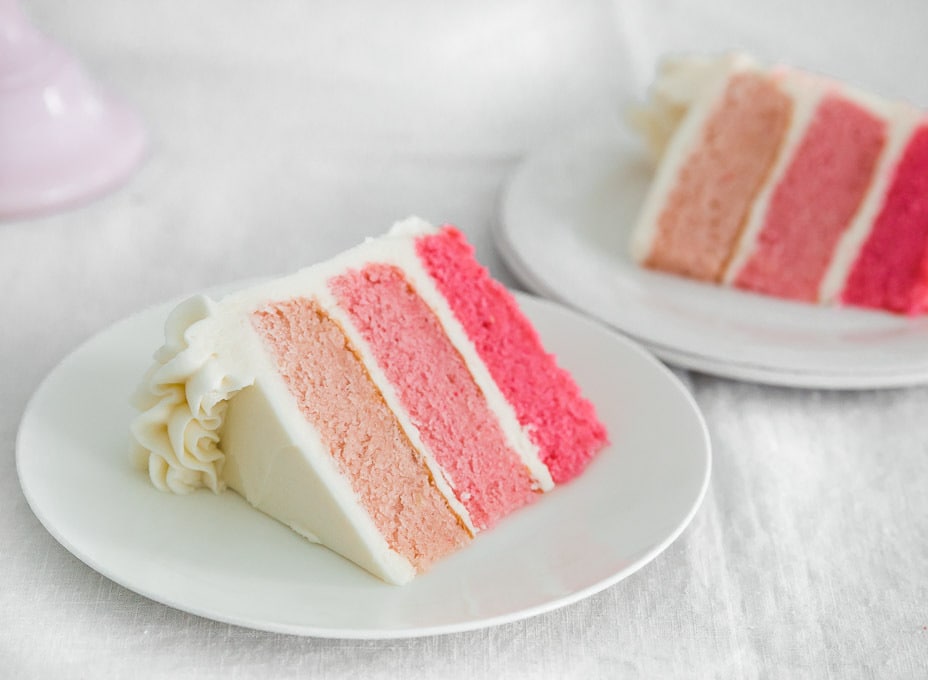
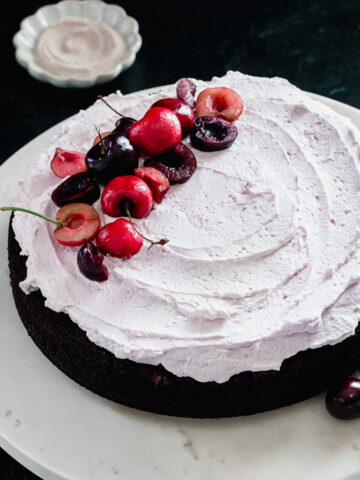
This gender reveal cake is a great idea for disclosing the gender of someone’s upcoming bundle of joy! It’s made of three layers of moist and delicious dyed vanilla cake, and frosted with easy, creamy vanilla buttercream.
While you could easily buy a gender reveal cake at a bakery, I prefer to make everything at home from scratch.
I recently made this gender reveal cake with an ombre effect for a good friend of mine who’s having a baby boy. I used blue dye instead of pink, but it works just the same.
My heart was racing as I watched her slice into the cake – I remember the excitement of finding out the gender of my baby and was so excited for her.
The cake was a hit and it was the perfect way to disclose the gender – she’s over the moon about her upcoming baby!
This is also the perfect dessert for a Barbie-themed birthday cake too!
How to make a gender reveal cake
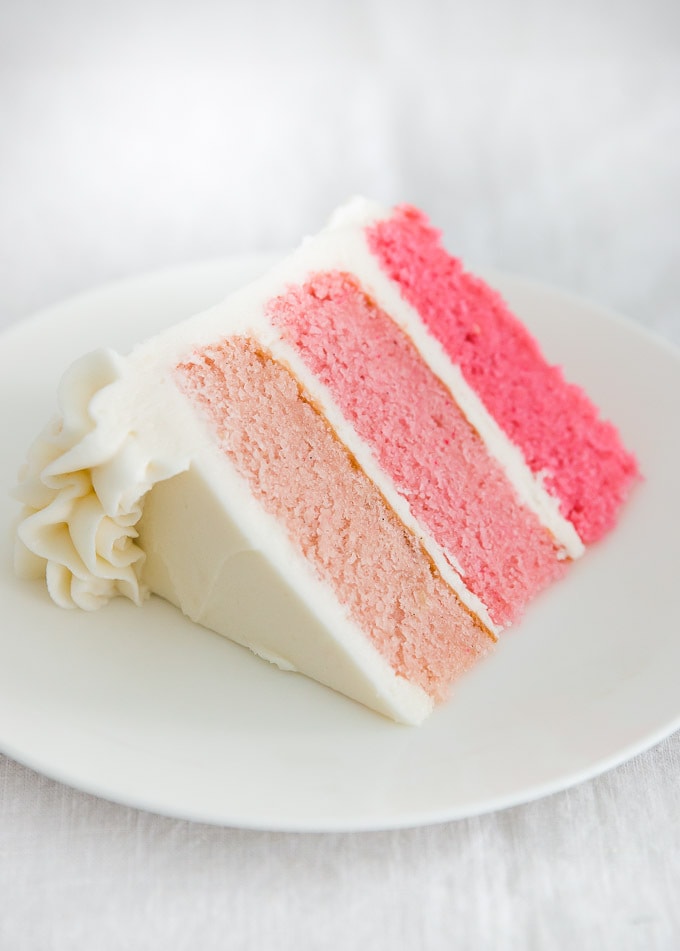
This ombre cake is my favorite gender reveal cake idea. It’s so pretty, yet simple! The cake is a moist, delicious vanilla cake and the frosting is my classic buttercream recipe.
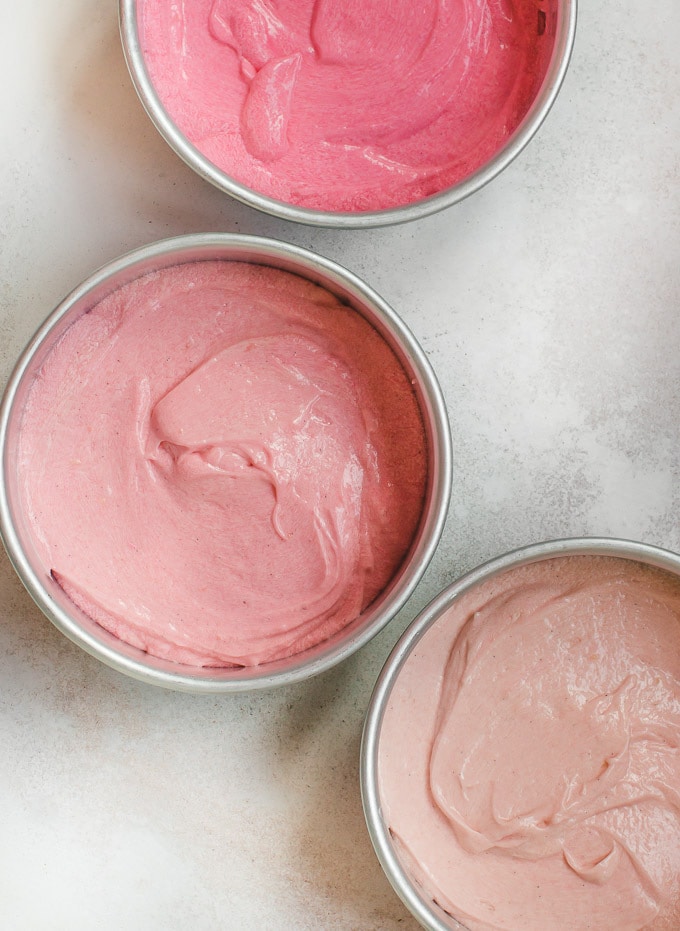
I use a delicious, moist vanilla cake batter and divide the cake batter into three bowls. I like to dye each layer with a different amount of the same food coloring to give the final result an ombre effect. For baby girl gender reveal cakes, I use this soft pink gel food coloring. You can also find it in blue or whatever color you want to dye your cake).
This dye is very concentrated, so a tiny drop of it was all I needed to get the proper color for the first bowl of batter. Then, I added a bit more food coloring to the second bowl until I liked the color. Repeat one final time with the third bowl, creating three distinct pink colors.
To make things even simpler, you can dye the entire batter using the same color (adjust the coloring to your liking) and divide the batter into three. Either way, you will make a gorgeous cake!
Would you like to save this recipe?
Alternate natural cake dye suggestions
Since food dyes can be controversial and cause allergic reactions, you might be looking for another option. The most natural plant-based coloring I know is to use plant-based powders without additives.
Please know that they won’t be as vibrant, more of a pale pink. It’s much harder to achieve the ombre look as that would require a different technique.
Red/pink options include beet powder or dragonfruit powder. Natural dye options might work better in the frosting layers instead.
Natural blue colors do bake with more vibrance. I like to use a combination of blue spirulina and butterfly pea flower.
Tips: Always mix powders in with another dry ingredient first for best color distribution. If you use too much powder, it can throw off the cake batter’s wet/dry ratios resulting in a dense cake.
How to make a smaller gender reveal cake
This recipe makes enough cake batter for a three layer 9-inch cake. If you want to make a three layer 6-inch cake, divide the cake recipe by 2.
You’ll just need to adjust the baking time. Smaller cakes mean less baking, so start checking them for doneness at around 20 minutes.
For any other cake pan sizes, check out my article on converting cake pan sizes. This will help you calculate exactly how much batter to make.
If using 6-inch round pans, I suggest making ¾ of the amount of buttercream if you want thick layers of frosting like you see in the photos.
More of my favorite celebration cakes
- Funfetti Cake with multicolored sprinkles.
- Ultimate Chocolate Layer Cake for chocolate lovers.
- Black Forest Cake for chocolate cherry lovers.
- Red Velvet Cake for a mild chocolate flavor.

Gender Reveal Cake
A gorgeous, three-layer ombre cake made with layers of moist vanilla cake and classic vanilla buttercream! Use dye to make this cake either blue or pink.
Ingredients
Cake
- 3 cups (420g) all-purpose flour
- 1 tablespoon baking powder
- ½ teaspoon salt
- 1 cup (2 sticks/227g) unsalted butter, softened to room temperature
- ¼ cup (60 ml) canola or vegetable oil
- 2 cups (400g) granulated sugar
- 4 large eggs
- 1 tablespoon pure vanilla extract
- 1 and ¾ cups (420 ml) whole milk
Vanilla Buttercream Frosting
- 1 and ½ cups (3 sticks/340g) unsalted butter, softened to room temperature
- ⅛ teaspoon salt
- 5 cups (600g) powdered sugar, sifted, plus more as needed
- 5 tablespoons (75 ml) heavy cream
- 1 tablespoon pure vanilla extract
Instructions
-
Preheat oven to 350°F/180°C. Butter three 9-inch cake pans, and line the bottoms with parchment paper.
Make the cake
-
In a medium bowl, sift together flour, baking powder, and salt. Set aside.
-
In the bowl of an electric mixer fitted with the paddle attachment, beat butter, oil, and sugar on medium speed until light and fluffy, 3-4 minutes. Scrape down the sides and bottom of the bowl as needed.
-
Add eggs, one at a time, beating well after each addition. Beat in vanilla extract.
-
With the mixer on low speed, add the flour mixture in three additions alternating with the milk in two additions, beginning and ending with the flour mixture. Do not overmix the batter. The less you mix, the lighter the cake will be.
Dye the batter and bake
-
Divide the batter as evenly as possible into three bowls. Add food coloring to each bowl until desired color is reached. Add just a tiny drop at first because food colorings can be very concentrated.
-
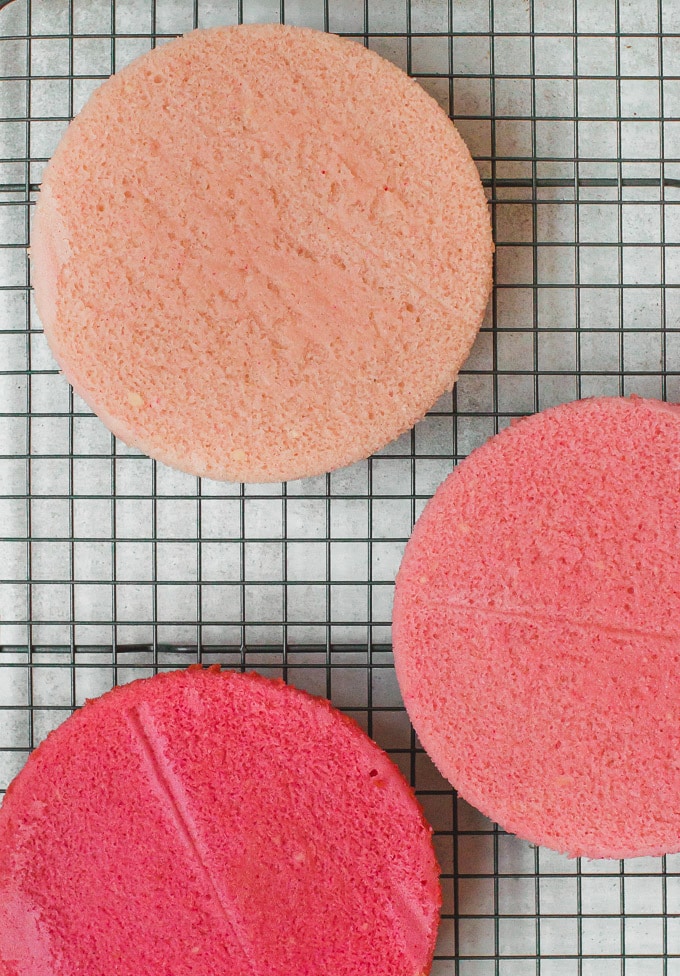
Pour each bowl of batter into prepared pans. Bake for 25-30 minutes until a toothpick inserted into the center of the cakes comes out clean.
Allow cakes to cool for 15 minutes, then gently remove from pans and allow them to cool completely on a wire rack.
Make the frosting
-
In the bowl of an electric mixer fitted with the paddle or whisk attachment, beat butter and salt on medium speed until smooth and creamy, about 2 minutes.
-
Add 5 cups powdered sugar, heavy cream, and vanilla. Beat on low speed for 30 seconds, then increase speed to high and beat for 2 minutes. Beat in more powdered sugar if frosting is too thin.
Assemble the cake
-
If the cakes rose too much, cut their rounded top with a knife to make them flat. Set one cake layer on a plate or cake stand.
Once cakes are completely cooled, evenly spread a thick layer of the frosting over the cake to the edge.
-
Top with the second cake layer and spread a thick layer of the frosting. Finish with the third cake layer. Spread frosting over the top and sides of the cake.
Recipe Notes
Note: To use different sized cake pans, check out my article on converting cake pan sizes to learn how to adjust the recipe. To make a 6-inch 3-layer cake, divide the recipe in half and adjust baking times.
Storing and Serving
Store cake in the fridge, but bring it to room temperature before serving. The cake can be made a day in advance.

Shar says
Hi do you think buttermilk would work here instead of milk in the cake batter? I know a lot of recipes use buttermilk to achieve a very moist cake
Shiran says
You can use buttermilk to make the cake more moist, but the cake is moist without it. I recommend using 1 cup of buttermilk instead of 1 cup of milk, and if you like the result you can replace it all with buttermilk next time.
Momma Of Eight says
oh BABY
Natalia says
The cake seems a little small. Should I double the ingredients to make my 9” pans a little more full and for a taller cake?
Shiran says
Hi Natalia, the cake in the photo is a bit smaller than 9-inch, but the recipe is exactly what you need for a 9-inch cake. You can trust the recipe 🙂
Diane E Mather says
Hi – can you use box cake mix
Shwetha Acharya says
Planning to make this for my daughter’s birthday as she’s very fond of pink! Do the cakes rise well? Doesn’t seem to have risen much in the pics. And how to mix the food colouring in without over-beating the batter?
Nastasia Johnson says
amazing recipe!!! mycake turned out amaing. can i use this to make cupcakes!!!
Shiran says
Yes you can 🙂
Keriane says
Hi..to devide the batter for a 6inch layer must the baking powder be divided as well??thank you
Shiran says
Yes!
Hanne V says
It was delicious ! Perfect recipe but I added 100 grams less sugar in to the cake and made it with soy milk. It was sweet enough because of the crème au beurre. Thank you: a big succes!
Lorraine says
Wow followed this recipe to a tee and this has turned out to be one of the best cakes I’ve ever made. So moist and fluffy, amazing texture with a beautiful crust. Thank you so much my friend absolutely loved it!
Angelina Herrera says
Do I need to use whole milk or can I use any other type of milk! ?
Shiran says
I recommend using whole milk. If using lower fat milk, the cake won’t taste as good.
Rachel says
Hi Shiran,
This cake looks beautiful! I’m planning on making it for my daughters 3rd birthday in June. Re: the buttercream frosting, would full cream milk work instead of the heavy cream?
Shiran says
Hi Rachel! Heavy cream is my favorite option but milk would work as well, but you won’t need to use the same amount (it would be too soft). I’d start with the butter and sugar, and then add some milk until you like the texture.
Rachel says
Thank you so much Shiran, I am planning on making this in 6inch tins., hopefully it all works out!
lexie croker says
Would you be able to use baking flour instead of AP?
Shiran says
I’m not sure what baking flour means. Can you please explain?
Dani says
I made this and it didn’t go well. I had to cook it longer than the recipe as it was still quite wet in the middle at the 30 minute mark. The cake itself was soft and fluffy (and tasty!) however found it be quite crumbly and it was a horror to assemble and ice which is where it all went wrong. I have heard that crumbly is usually due to not mixing the batter enough however didn’t want to over mix. I am very new to baking cakes so I am sure it’s all down to rookie error and not your recipe. Just wondering whether you had any tips? Definitely want to master this! Thank you
Shiran says
Hi Dani, it’s hard to tell what went wrong without being there. It can be many things. The most important thing is to measure the ingredients correctly, and not overmixing is a good thing! Regarding baking time every oven is different so it can happen. Also avoid opening the oven door too often so that the temperature won’t drop.
Hawah Musa says
Hy Shiran , I love all your recipes , and i always try them out .thank u so much . But i dont know why my cakes are not moist .Can you please help me with this. Thank u so much .
Shiran says
Thank you so much! I’m glad you enjoy them 🙂 The best tip is to mix the batter as little as possible once you add the flour. Overmixing can make cakes dry. Another important thing is to bake the cake just until a toothpick comes out clean or with a few moist crumbs to insure the cake is moist. Overbaking can also dry out the cake.
Angelina Herrera says
Can I use cake flour instead of all purpose flour ?
Margie says
Moist, delicious, vanilla cake. Halved the recipe to make a small layered cake for my 4yo’s birthday. Didn’t have milk, so used cream instead (oh darn !). Had to cook it for quite a bit longer than 30 min…I would say I ended up doing 40 min for the smallest layer, and longer for my largest. Made a cream cheese frosting to go with it.
I have to say Shiran, you nail it with these recipes. I always come to Pretty Simple Sweet for a base recipe and then either follow it exactly or tweak it for my needs. Your recipes NEVER disappoint! Love having a resource on the internet that I can count on.
Sowmya says
Hi, should I double the recipe for 12inch cake ?
Shiran says
Hi 🙂 I recommend checking out my article on how to convert cake pan sizes 🙂
Anqi Tan says
My work colleagues loved it!
Jene Auxier says
I just made this cake for my daughter’s 3rd birthday because she loves the Pinkalicious books. I followed the directions for the 6 inch, with extra frosting and sprinkles. It turned out wonderful – she was just wowed by the cake. Thank you Shiran!
Elisabeth says
Love this! Just tried to bake it in 6inch pans. They collapsed a bit when I took them out of the oven. So the layers came out a bit thin. Any tips to prevent collapsing? I followed each step carefully. They look super moist though! Decorating tomorrow <3
Freddie says
Haven’t made the cake yet, but i noticed from the recipe this seems to be a yellow cake? I’ve had trouble in the past getting food coloring to show well on yellow cake (blue food coloring turns green). How do you achieve a good color?
Stephanie @ Pretty.Simple.Sweet. says
Hi Freddie, I used a gel food coloring in this recipe with great results.
Cheryl Harris Squares says
Delicious, moist cake. I’ve used it twice now for 2 different gender reveal cakes (1 pink ombré and 1 blue ombré). My only question is how do you keep your buttercream so white?!
Talia @ Pretty. Simple. Sweet. says
Hi Cheryl, the buttercream is naturally white, and when you beat the butter and powdered sugar together it adds air to the frosting, which also helps give it a clean white color. Try beating the butter and sugar together a bit longer if your buttercream is appearing a bit yellow from the butter 🙂
maile norton says
Does this recipe need to be refrigerated? Is it the cake part or frosting part that needs to be or both? I want to make a cake that doesn’t need to go in the fridge. If I just need to switch one thing that would be nice.
Talia @ Pretty. Simple. Sweet. says
Hi Maile, this cake does not need to be refrigerated.
John Harold says
I wish you had said use paste not for colouring I have wasted my time and ingredients now having to start again 😢
Stephanie @ Pretty.Simple.Sweet. says
Hi John, the recipe should turn out well with whichever food coloring dye you have on hand. The key is to make each 1/3 of the batter a slightly darker shade. Whichever dye you use, just be sure you achieve the desired color you’re looking for. That’s all that matters. 🙂
Gemma says
Hello, thanks for the recipe! I was just wondering how many serves the 9-inch 3-layer cake will make. I keep getting different answers on google. Appreciate it.
Stephanie @ Pretty.Simple.Sweet. says
Hi Gemma – the servings really depends on how you cut your cake. If you cut it in the standard way, 12-16 slices (6-8 from each half). There are also other cutting methods I’ve seen to yield up to 32 slices from a 9-inch round cake.
Kaja says
Maybe not suitable for UK ingredients.
I followed the recipe meticulously, ensured I did not over mixed the batter, despite this the baked sponges were very heavy and dense and I could not use them.
As for icing, that was delicious and I will use it in my future cake recipes 🙂
Stephanie @ Pretty.Simple.Sweet. says
Sorry to hear this didn’t turn out well for you. Did you measure out ingredients by weight? I always include measurements in metric for the most accurate recipes possible. Measuring by cups isn’t as accurate.
Shari J Kreuter says
Hey I’m making this tomorrow when we get my daughters babies gender results – I wondered if this icing is good for decorating also? Thank you Shari
Stephanie @ Pretty.Simple.Sweet. says
Hi Shari, yes the buttercream is nice for decorating too! Congratulations!
Shari J Kreuter says
Hey I made the cake it turned out well!! Maybe a little dense not fluffy I probably over mixed it. When dividing the batter into 3 it was about 2 cups each. Don’t buy the pastel coloring gel it takes a lot of it to get your color! Ours was pink we are having a girl thank you for the recipe & directions!
Christina Diaz says
When storing the iced cake in the fridge does it need to be sealed or covered to stay fresh for the next day?
Stephanie @ Pretty.Simple.Sweet. says
Hi Christina, yes, I always recommend an airtight container to reduce drying out your cake and keeping it fresh!
Saide says
how can you know the Gender of your baby? don’t you mean the Sex of your baby? Sex has to do with biology, and gender has to do with identification which comes later. It’s an honest, real, actual question. It should be called a Sex Reveal Cake, as the fetus cannot determine or declare their gender while still in womb.
Stephanie @ Pretty.Simple.Sweet. says
Hi Saide, while I completely and 100% agree with you and absolutely will not argue, the title of all blog posts (not just mine) has to do with search terms. People search “gender reveal cake” much more frequently than “sex reveal cake”. Blogging is about providing helpful solutions for search result queries. So the best way I can help people, is to keep the terminology in line with what they’re searching for. Hopefully that clarifies things.
Nicole says
how many drops of soft pink gel food coloring did you use for each cake layer?
Stephanie @ Pretty.Simple.Sweet. says
Hi Nicole start with just one drop for the lightest pink layer if your food coloring is highly concentrated. You’ll have to add more to the remaining two batters based on your own color preferences. Start with 2 more drops of color for the second one, 4 drops of color for the third. And adjust from there.