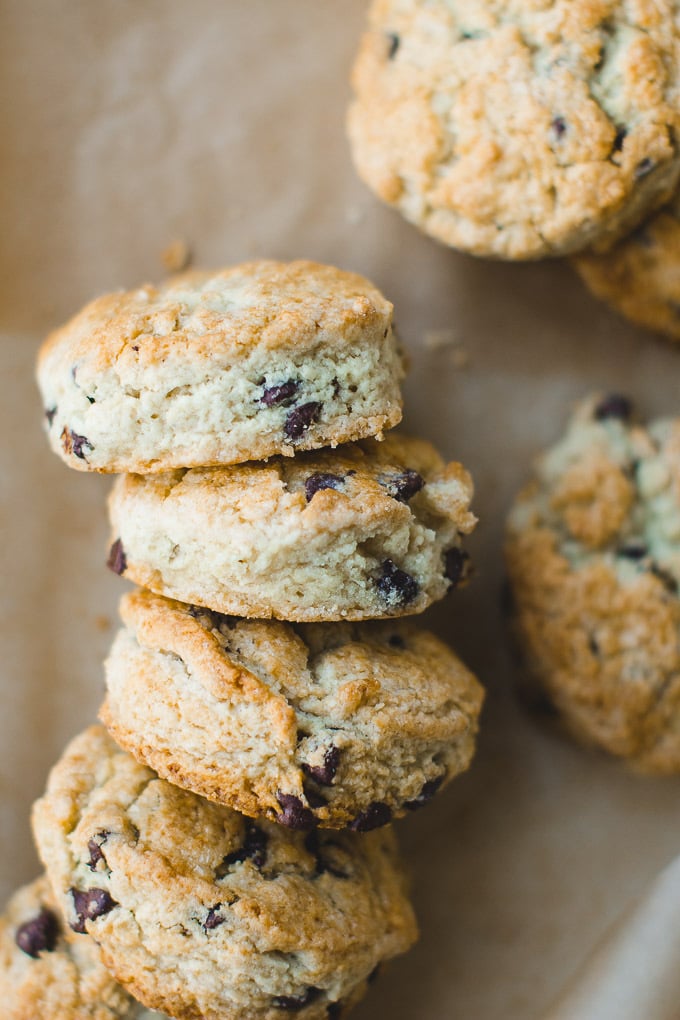
These chocolate chip scones are rich in flavor and tender in texture. They are slightly sweet, loaded with chocolate chips, and super easy to make! Here’s how to make them perfect.
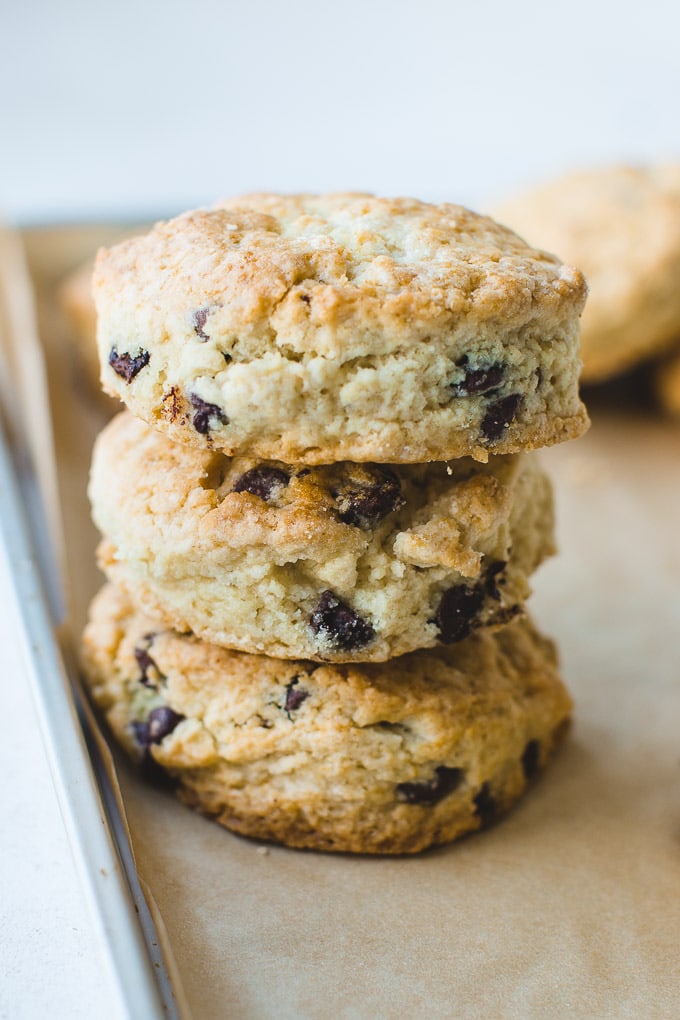
Scones are a simple pastry to make once you know the technique behind them (trust me, it’s easy :). The perfect scone has a slight crunch on the outside and is soft, tender, buttery, and flaky on the inside. It should be slightly sweet and break apart easily.
This chocolate chip scone recipe fits the bill for the perfect scone! I love making these for breakfast, brunch, or just keeping a batch in my freezer along with pumpkin scones and triple chocolate scones for whenever I get a scone craving.
What are scones and what gives them their unique, flaky texture?
Scones are a delicate pastry that are thought to have originated in Scotland in the 1500s. Today, they are a very common British baked good commonly served at tea time.
Scones are a slightly sweet, tender, cakey and flaky pastry. What gives them their unique texture is the way you incorporate the butter into the ingredients. Butter must be very cold and is first cut into small pieces. Then, it needs to be “cut” into the dry ingredients. I prefer using a pastry cutter to do this, which breaks up the butter into tiny pieces throughout the dry ingredients. During the baking process, these tiny pieces of butter melt and release steam, creating tiny air pockets, which is what gives scones their flaky texture.
This is the same method used when making pie crust and biscuits.
How to make chocolate chip scones
- Combine the dry ingredients. In a large bowl, whisk together flour, baking powder, sugar, and salt.
- Cut in the butter. Cut the butter into the dry ingredients with a pastry cutter, two forks, or even your your fingers until the mixture resembles coarse meal and there are small uneven pieces of butter throughout. Alternatively, you can place the dry ingredients in a food processor with the cold butter pieces and pulse a few times to break up the butter. If you use a food processor, remove the ingredients from the food processor and continue to recipe in a large bowl, mixing by hand.
- Mix in the chocolate chips to the flour-butter mixture.
- Combine the wet ingredients. In a small bowl mix the egg, heavy cream and vanilla extract.
- Mix together. Add most of the wet mixture to the flour mixture, leaving a bit for adding if needed. Stir mixture with a spatula or fork until dough begins to form. If dough is too crumbly, add more of the cream mixture as needed, although it should be a drier dough. Don’t overmix.
- Transfer dough to a floured surface form into a disc.
- Chill.* I highly recommend chilling the scone dough for 1 hour wrapped in plastic wrap to allow it to get as cold as possible before baking. This will help the scones hold their shape and become thick.
- After chilling, form your scones into shapes. For round scones: Pat dough into a 9×6-inch rectangle about ¾-inch thick. Using a 2.5-inch (6.5 cm) biscuit cutter, cut out 6 rounds. Press the leftover dough into another ¾-inch thick piece and repeat the process to get 2-3 more biscuits.
- For triangular scones: Pat dough into a 8 or 9-inch (23 cm) circle about ¾-inch thick. Cut circle into 8 even wedges, similar to a pizza.
- Place scones on prepared baking sheet. Brush the tops with heavy cream. Bake for 12-16 minutes at 400°F/200°C, or until golden brown. Transfer baking sheet to a wire rack and allow to cool for 10 minutes. Serve warm or at room temperature.
Would you like to save this recipe?
*Note: To avoid chilling the scone dough for a full hour, you can also cut your scones into shapes immediately. Then, place them on a prepared baking sheet and set in the fridge or freezer for 15-20 minutes before baking.
How to cut butter into the dry ingredients
There are five ways you can do this:
- Pastry cutter. This tool allows you to press the cold butter cubes into the dry ingredients by hand until they are tiny pieces.
- Food processor. Add the dry ingredients and cubed, cold butter to the food processor and pulse gently until the butter is cut up into small pieces. Pour the mixture back into your bowl before moving on to the next step.
- Grate the butter. Yes, you heard that right. You can actually place the butter in the freezer, grate it right into the dry ingredients, and mix together.
- Use two forks. If you don’t have the kitchen tools listed, you can simply use two forks to press the butter into the dry ingredients by hand. Just be sure to get the butter pieces as small as you can.
- By hand. You can also break the butter up by hand. This will take a bit longer and it’s more difficult to get the butter pieces small enough this way, but it can work.

Tips for making chocolate chip scones
- Use cold ingredients. For scones to bake properly, the butter needs stay cold. Make sure to use very cold butter as well as chilled wet ingredients.
- Add the liquid gradually. Different brands of flour absorb different amounts of liquid, so you may not need all the liquid in the recipe, or you may need a bit more. If the dough doesn’t come together easily or if it’s too dry and crumbly, add more cream, a little at a time, until the dough starts to come together. If the dough is too wet and sticky, making it hard to handle, add a bit of flour.
- Don’t overwork the dough. The the less mixing you do, the softer the scones will be.
- Serving. Scones are best served on the day of baking. If you have leftovers, freeze the scones in a sealed container for up to 1-2 months. Thaw in the fridge overnight, at room temperature for a couple of hours, or reheat in a preheated oven.
More of my favorite scone recipes
- Blueberry Scones: Rich, tender and baked with fresh, juicy blueberries.
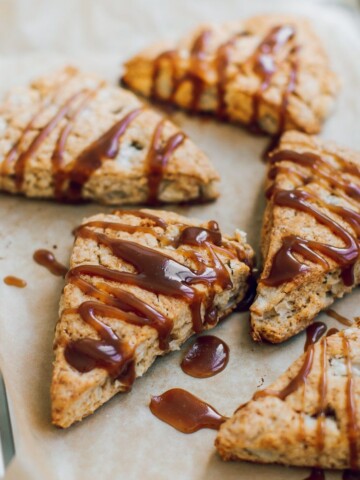
- Salted Caramel Apple Scones: Made with juicy apples and gooey caramel sauce.
- Fig Scones: Made with fresh figs and honey.
- Cream Scones: Ultra rich and buttery scones made richer by heavy cream.
- Banana Chocolate Chip Scones: Bursting with flavor – one of my favorites!

Chocolate Chip Scones
These scones are buttery, flaky, and tender. They're slightly sweet and loaded with chocolate chips!
Ingredients
- 2 cups (280g) all-purpose flour, sifted
- 1 tablespoon baking powder
- ¼ cup (50g) granulated sugar
- ½ teaspoon salt
- ⅓ cup (75g) cold butter, cut into small cubes
- ¾ cup chocolate chips or mini chocolate chips
- 1 large egg
- ¾ cup (180 ml) heavy cream, plus 1 tablespoon, for brushing the tops
- ½ teaspoon pure vanilla extract
Instructions
-
Preheat the oven to 400°F/200°C. Line a baking sheet with parchment paper or a silicone baking mat. Set aside.
-
In a large bowl, whisk together flour, baking powder, sugar, and salt. Toss the butter into the flour mixture and cut it into the dry ingredients with a pastry cutter, two forks, or your fingers until the mixture resembles coarse meal and there are small uneven pieces of butter throughout. Mix in chocolate chips. In a small bowl mix the egg, heavy cream and vanilla extract. Add most of the mixture to the flour mixture, leaving a bit for adding if needed. Stir mixture with a spatula or fork until dough begins to form. If dough is too crumbly, add more of the cream mixture as needed. Don’t overmix.
-
Transfer dough to a floured surface and gently form into a disc shape.
-
I highly recommend chilling the scone dough for 1 hour (wrapped in plastic wrap) to allow it to get as cold as possible before baking. This will help the scones hold their shape and become thick. Alternatively, you can cut your scones into shapes immediately. Then, place them on a prepared baking sheet and set in the fridge or freezer for 15-20 minutes before baking.
-
For round scones: Pat dough into a 9×6-inch rectangle about ¾-inch thick. Using a 2.5-inch (6.5 cm) biscuit cutter, cut out 6 rounds. Press the leftover dough into another ¾-inch thick piece and repeat the process to get 2-3 more biscuits.
-
For triangular scones: Pat dough into a 8 or 9-inch (23 cm) circle about ¾-inch thick. Cut circle into 8 even wedges.
-
Place scones on prepared baking sheet. Brush the tops with heavy cream. Bake for 12-16 minutes, or until golden brown. Transfer baking sheet to a wire rack and allow to cool for 10 minutes. Serve warm or at room temperature.
-
Scones are best eaten the same day they are made, but can be frozen for up to 1-2 months. If you want to serve them warm, reheat in the oven before serving.

Reut says
Great recipe. Just made it.
Thanks!
TFI says
looks and sounds delicious!!!!
Tara Wilkinson says
This is now my go to recipe. Just tried it with self raising flour as I had no baking powder though and it still worked great. I pop these in the freezer and they defrost brilliantly
Tina says
Thank you, very simple recipe and they turned out beautifully. So delicious and light.
Narayan Mali says
Nice post supar recipe
Narayan Mali says
Sorry renting to five star
Ashley says
Love it! So soft and well balanced with the chocolate
Taylor says
So soft and a delicately sweet flavor. Will be making these often!
Stylica says
looks delicious!!!! Thanks for sharing easy to understand and actionable.
Eric James says
Amazing! looks very delicious i shall try this.
Stella says
I’ve made these so often, one of my favorite recipes! They are a perfect dessert, gift, or warm breakfast if you need a little something sweet! They are so easy to make, and the result is amazing!
Alicyborg says
Your recipe was very good, I will definitely follow the recipe made by you at your home. I was looking forward to making them for Christmas and they turned out very good.
Valerie Varhaug says
After a recent trip to Dublin, I was inspired to bake a batch of scones. Feeling a need for chocolate at the same time, this recipe fit the bill. Easy and pleasing (hubby said these were my best yet), I topped them off with a simple orange glaze and will be making these again and again!
Mary says
Absolutely delicious! My family loves them 🙂
Joanne says
I just made it today and they turned out really good! I want to play with it and make different kinds of flavors f it!
Thank you so much!!!
Stephanie @ Pretty.Simple.Sweet. says
Yum! Thanks for baking with us!
Caitlin says
Excellent scones! As good, if not better than anything you can buy in a bakery.
Stephanie @ Pretty.Simple.Sweet. says
Thank you for your kind review, Caitlin! I appreciate it!
Aly says
What am I doing wrong?? I’ve followed the instructions step by step and mine taste gross. I bought all fresh new stuff so what’s happening 😭
Stephanie @ Pretty.Simple.Sweet. says
Hi Aly, how are you measuring – by weight or by cup (volume)? If the flour measurement is off, that could very well be the reason.