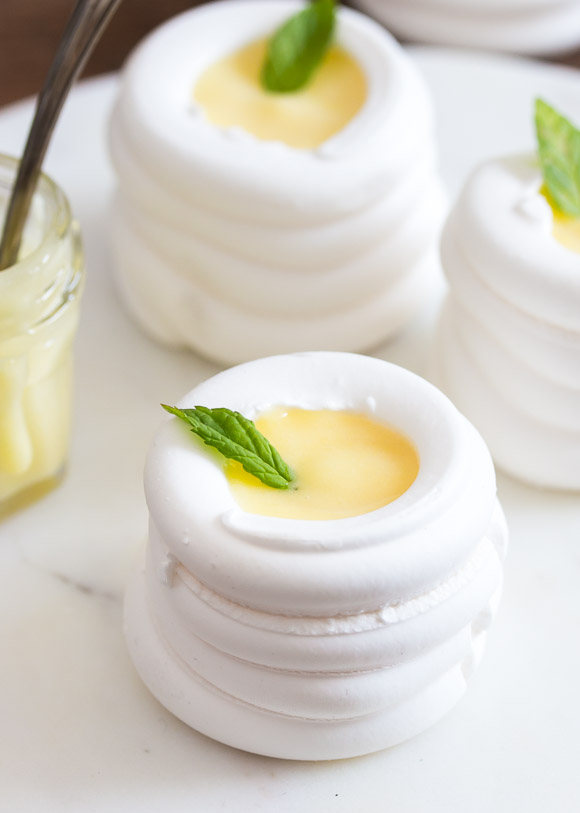
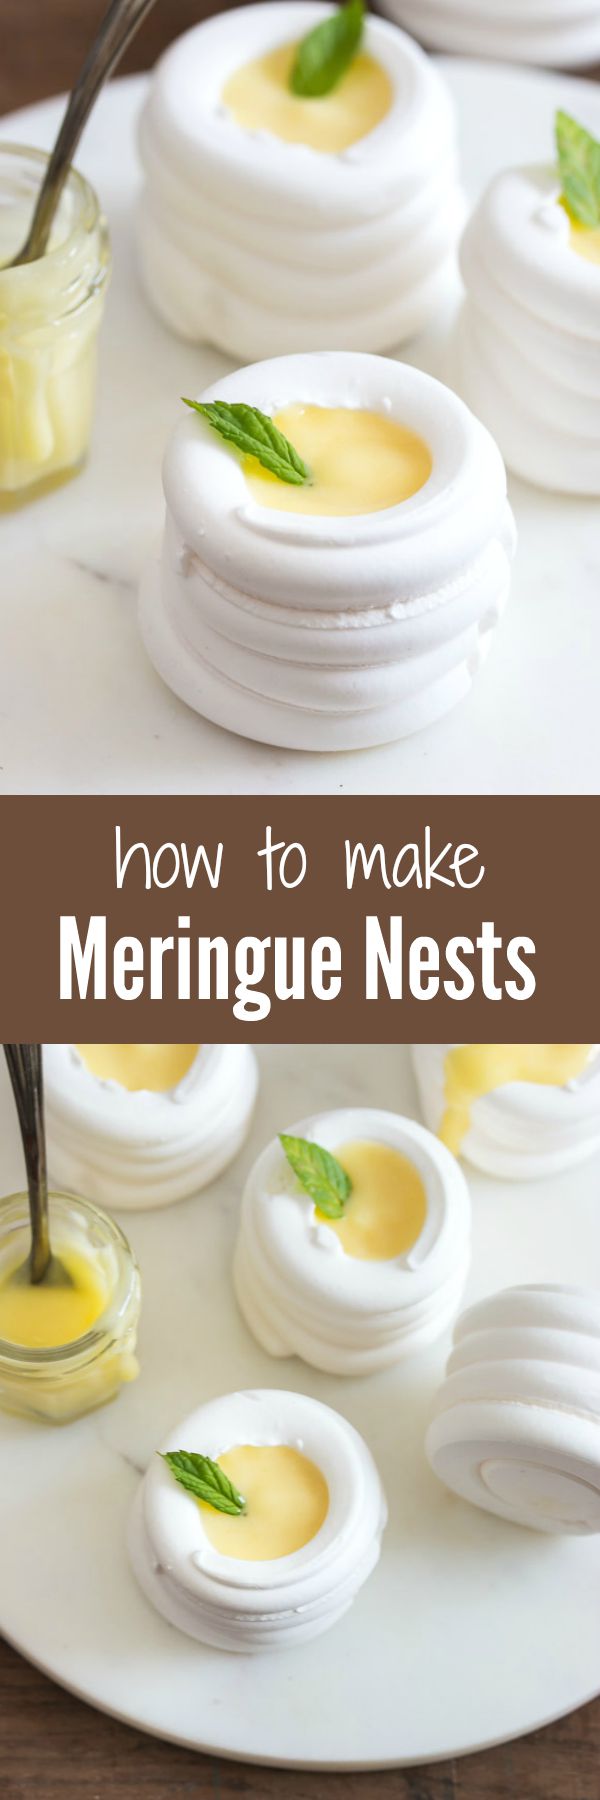
These beautiful little meringue nests are both crunchy and soft, and once bitten into, they will melt in your mouth. Make them large or mini, and fill them with anything you want.
Growing up, I didn’t really love meringues and found them too sweet, but that all changed once I found out that there are different versions of meringue such as pavlova, flavored meringues, and filled meringue nests, also known as meringue shells.
Meringue is made with very few ingredients. Egg whites and sugar are a must, and the rule of thumb is to use ¼ cup of sugar for every egg white. The addition of cream of tartar is optional, but I recommend it as it helps in stabilizing the meringue and reaching its full volume. However, if you want to substitute it, you can use lemon juice, white wine vinegar, or even a pinch of salt. Lastly, vanilla extract is added for a great flavor.
What you won’t be able to get enough of is the meringue texture. The outside shell of these meringues is crispy, but the inside is soft. Once you bite into the crunchy crust, it instantly melts in your mouth. Just imagine combining it with whipped cream and fruit, lemon curd, or chocolate.
How is meringue made?
Before you start, make sure that the bowl and beaters are clean and grease-free. Grease prevents the egg whites from whipping up properly, so it’s very important that everything is perfectly clean.
Beat the egg whites on medium-low speed until they start to get foamy, then add cream of tartar. Keep beating until soft peaks just start to form. That’s the time to start adding sugar and increasing your mixer speed. Adding sugar by the spoonful is a process that takes a few minutes, and then you’ll need to keep beating until the sugar fully dissolves into the meringue and stiff peaks form. You can rub a bit of meringue between your thumbs to check if it’s gritty or smooth. If gritty, keep beating.
Would you like to save this recipe?
Is it ready yet?
Meringues require a long baking time at a low temperature. They are usually ready once they appear dry and are easily lifted from the parchment paper with their bases intact. Sometimes, though, especially for large meringues, it’s hard to know if the center has baked properly. It’s ok if it’s quite soft and marshmallow-like, but it shouldn’t be sticky like gum. If you don’t care how white your meringues are, you can slightly increase the temperature and bake for less time.
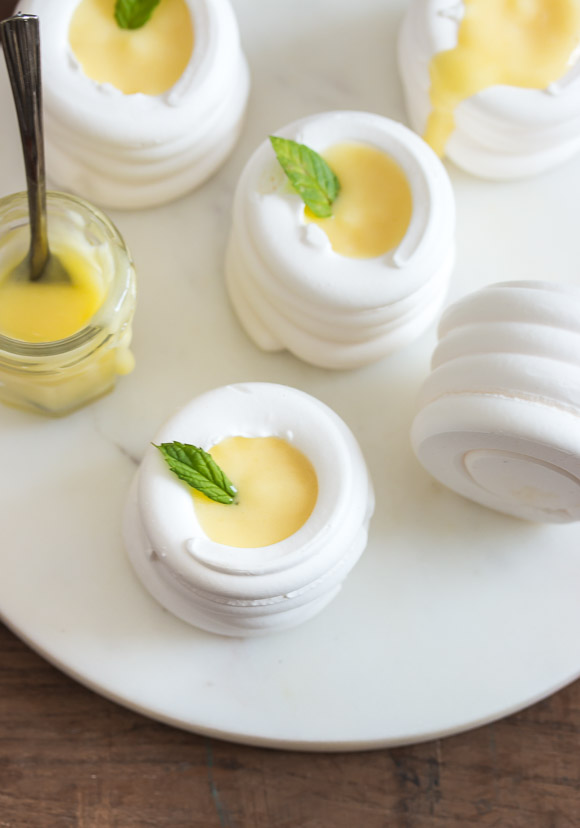
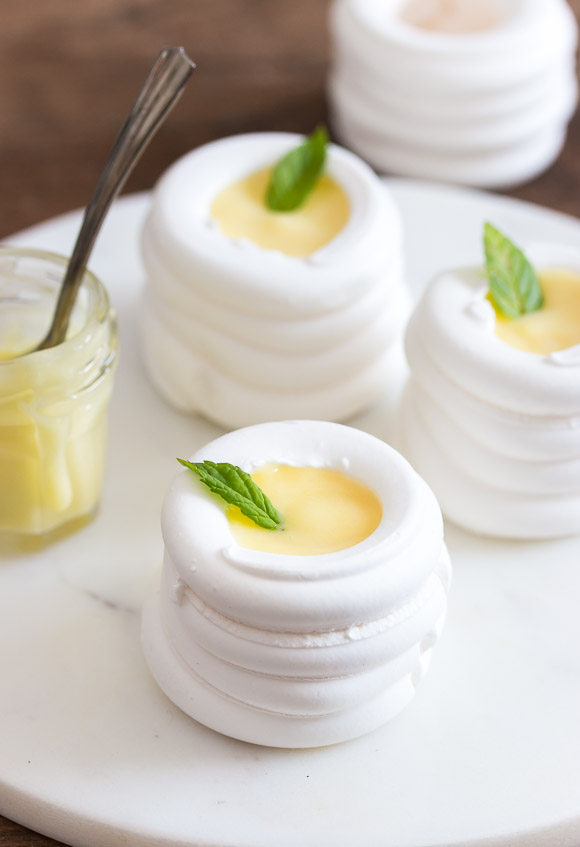
Fill the meringue nests with regular or flavored whipped cream, lemon curd and fresh fruit, or drizzle with fruit sauce.
If you love meringue, then I have some special treats for you:
The most perfect pavlova ever
Eton mess, which is a strawberry, whipped cream, and meringue trifle
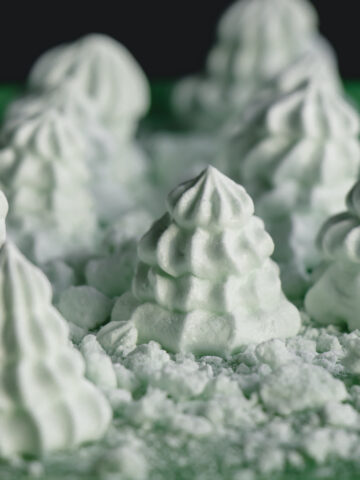
Simple white meringue cookies or kisses
Also, check out this guide that shows how to pipe meringue nests.

Meringue Nests
Ingredients
- 4 large egg whites
- ½ teaspoon cream of tartar , or 1 teaspoon lemon juice or white wine vinegar
- 1 cup (220 g/7.7 oz) caster sugar
- ½ teaspoon pure vanilla extract
Instructions
-
Preheat oven to 200F/90C. Line a baking sheet with parchment paper and prepare a pastry bag fitted with a round or star tip (mine had a 1cm opening). Set aside.
-
Before you start, make sure that your mixer bowl is extra clean and not greasy, as that would prevent the egg whites from reaching their full volume. In the bowl of an electric mixer fitted with the whisk attachment, whisk egg whites on medium-low speed until foamy. Add cream of tartar and continue whisking until soft peaks start to form.
-
Then, while mixer is running, add sugar, one tablespoon at a time, and increase mixing speed to medium-high. Go slowly. Adding the sugar and continuing to beat may take 5-10 minutes. The meringue is ready once stiff peaks form, it’s glossy and completely smooth but not dry, and the sugar is fully dissolved. Scrape down the sides of the bowl to make sure that no sugar is sticking. Beat in vanilla extract.
-
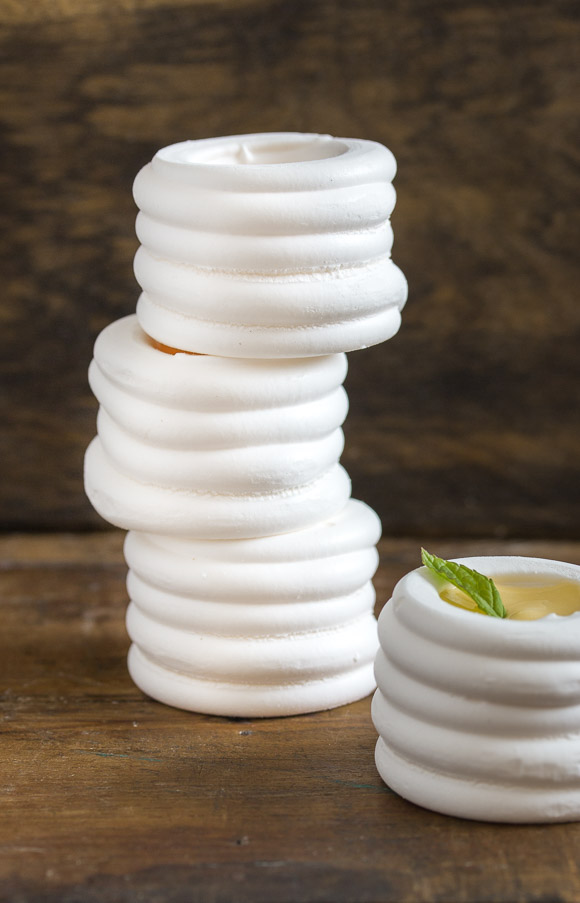
Transfer meringue to the piping bag. To prevent the parchment paper from sliding, pipe a little of the meringue on the underside of each corner of the paper and ‘stick’ it to the pan. Pipe a 5 cm (or any other size you want, depending on how big or small you want them) round spiral base on the prepared baking sheet, and without lifting the tip, pipe 2-3 circles on top of the outer edge to create a nest.
-
The amount of nests really depends on how wide or tall you make them. This recipe can make anywhere from 10 large to 30 minis. I usually make mine quite tall with a 5 cm base, and it yields me around 16-20 nests.
-
If you want to make pavlovas without using a piping bag, drop small mounds of meringue onto the baking sheet and, using a spoon, create a border so that the edges are slightly higher than the center.
-
Place in the lower part of the oven and bake for 2-3 hours, or until the meringues are dry, their centers aren’t sticky, and they are easily lifted from the parchment paper with their bases intact. Turn off the oven and, without removing, let meringues cool completely for at least one hour, or overnight.
-
Meringues will keep for several days in an airtight container at room temperature.
-
When ready to serve, fill the nests with a filling of your choice, such as whipped cream or lemon curd, and top with fresh fruit if desired.

NGOC LAN says
Thank you so much for this meringue version. I really want to try this recipe. Your photos and food styling are admirable.
Shiran says
Thank you so much for your sweet words! 🙂
Nardia may Lawless says
Best ones I have done
love the recipe
Nao Kondo says
How cute!!
and looks like Bibendum 😉
Yummy!
Shiran says
It does! 🙂
Anne says
These are adorable Shiran!!!
Shiran says
Thank you Anne!
Vanessa says
How far ahead can you make these? Would like to make them for a wedding.
Shiran says
Hi Vanessa, there should be no problem with keeping them at room temperature for several days as long as you keep them dry and in an airtight container to avoid moisture. Don’t place them in the fridge or expose them to air or they would start to soften. Also make sure to bake the meringues until they are completely dry.
Susan says
How did you fill the nests so neatly? They look beautiful?
Shiran says
Thank you, Susan! I used a piping bag to fill them.
Nicola says
Hi, what temperature would you use for a fan oven? 200 seems high, many thanks
Shiran says
Hi Nicola, fan ovens are indeed stronger but every oven is different. I would suggest baking at 160F/70C.
Ida says
Do I have to fill these right before serving, or can I fil them a few hours before?
Shiran says
Hi ida, filling them a few hours before is perfectly fine.
Syira says
Hi Shiran,
My oven is a little smaller so only one pan can be baked at one time. how about the balance meringue? while waiting for the ones in the oven finished baking should i pipe them in advance and let them sit at the counter or put in fridge..? appreciate your suggestion. ?
Shiran says
Hi Syira, I remember the time when I had a small oven 🙂 Basically meringue should be baked immediately after you make it, but if you have no other choice, just leave the other pan in a cool place (and do pipe them in advance).
Rifka says
Hi Shiran the meringue nest looks so scrumptious. Want to try my hands on it.Does the mini too needs 2-3 hours of baking at 200*c??
Shiran says
Yes, meringues require a long baking time at a low temperature because they need time to dry out without burning.
Ayse says
Hi,
I used vinegar instead of cream of tartar and the mixture did have peaks but didn’t hold the tall shape that you had.
Although I realised I had put 1/2 teaspoon of it rather than 1,any ideas why that happened?
Thankyou.
Shiran says
If the issue was that the meringue didn’t whip up properly, I recommend reading this guide about the common mistakes.
Anne says
Hi Shiran. Since I don’t t have caster sugar, could I use regular or powdered sugar instead?
Shiran says
Hi Anne, you can make your own caster sugar by processing granulated sugar in a food processor until fine.
Livi says
Hi, this is definitely my go-to recipe. I used cream of tar tar and the meringues held there shape very well indeed. The meringues were light and fluffy. I would strongly recommend this recipe to those trying to find a good recipe. Every recipe I have tried has not worked. These are beautiful with a berry compote.
Tina says
Hi, I was wondering I want to make some meringue cups and fill them the night before serving. Do you know if they will hold up in the fridge?
Shiran says
Hi Tina. You can keep them for several days in an airtight container at room temperature.
Makenzie says
Hello. I would like to make these as a surprise. Is there any way I can turn temperature up to make it cook faster? And if so what temperature ?
Sharon says
I have made these several times and they are outstanding — a wonderful light and fresh dessert. I put homemade lemon curd in the meringue nest, top it with fresh blueberries and then a dollop of fresh whipped cream. It is absolutely phenomenal.
Deborah Rogers says
I make meringue cookies every Christmas and in Wisconsin they call these little meringue shells, Schaum tortes. A secret ingredient I use to keep them crisp and keeps the humidity from affecting them is Meringue Powder by Wilton. I substitute the cream of tarter for this.
Mary says
Hello! How much meringue powder do you use in this recipe. I have been looking for a way to keep them crisp when humid. Thank you!
Heather Hudson says
I am not an experienced cook and had a craving for meringues to go with fresh strawberries and ice cream and couldn’t find any at the store. While I totally flubbed the piping part and ended up with rather abstract shapes on the pan they came out PERFECT!!! They were crisp and fluffy and not at all gummy – EXACTLY what I wanted. I will definitely make again and hope I can master the shaping.
Barbie says
Great recipe! Honestly, these were so easy and makes you look like a pro. Crispy, pure white, piped like a dream. First time making meringues, they turned out perfectly, even on a humid day. Thank you!
Maggie S. says
Hello! I’m going to give these a try for Easter. Would you recommend to strain the egg whites to remove the water the egg whites have for a stiffer meringue? Thanks in advance!!
Talia @ Pretty. Simple. Sweet. says
Hi Maggie, I don’t think this step is necessary. You can achieve stiff peaks without straining out the water. It’s simpler, saves time, and will achieves the same result 🙂
Kevin Spinosa says
Love the recipe but had some foamy eruptions from the middle is that normal or positive/negative lol thanks will sure be using this one again!
Stephanie @ Pretty.Simple.Sweet. says
Hi Kevin! Meringue can be a little tricky. As long as it tastes good, I think you’re fine!
ANNIE MCGOWAN says
I appreciate your instructions. They are clear with very helpful tips such as how to keep the parchment paper from moving, place the baking sheet on the lower rack, don’t decrease the amount of sugar and more ideas. Thank you!